Most website projects stall before anyone opens a design tool. Someone has to collect the brief, decide which pages the site needs, write headlines for every section, sketch wireframes and agree on colours and fonts. That's days of documents and back-and-forth, and the design work hasn't started yet.
The AI Site Planner, new in Canvasly Web Studio 2.6, does that groundwork in one short conversation. You answer a few questions, and Canvasly produces a project brief, a sitemap with every page and section, wireframes with real copy and a site style. Then you click Create website and Canvasly builds the whole draft from native, editable units.
Here's how it works, step by step.
Where to find the AI Site Planner
You can open the planner in three ways:
- From the AI panel: 🗺 AI Site Planner
- From Your projects: Plan a website with AI…
- From the menu: File → Plan a Website with AI…
Plans are saved as you work and listed when you open the planner again, so you can come back to a plan later.
Step 1: Write the brief (or paste one you already have)
Choose Start with AI chat and the planner asks one question at a time:
- the site's name and the kind of business
- what it does and for whom
- its services or products
- the main and secondary goals
- language, features, tone and pages
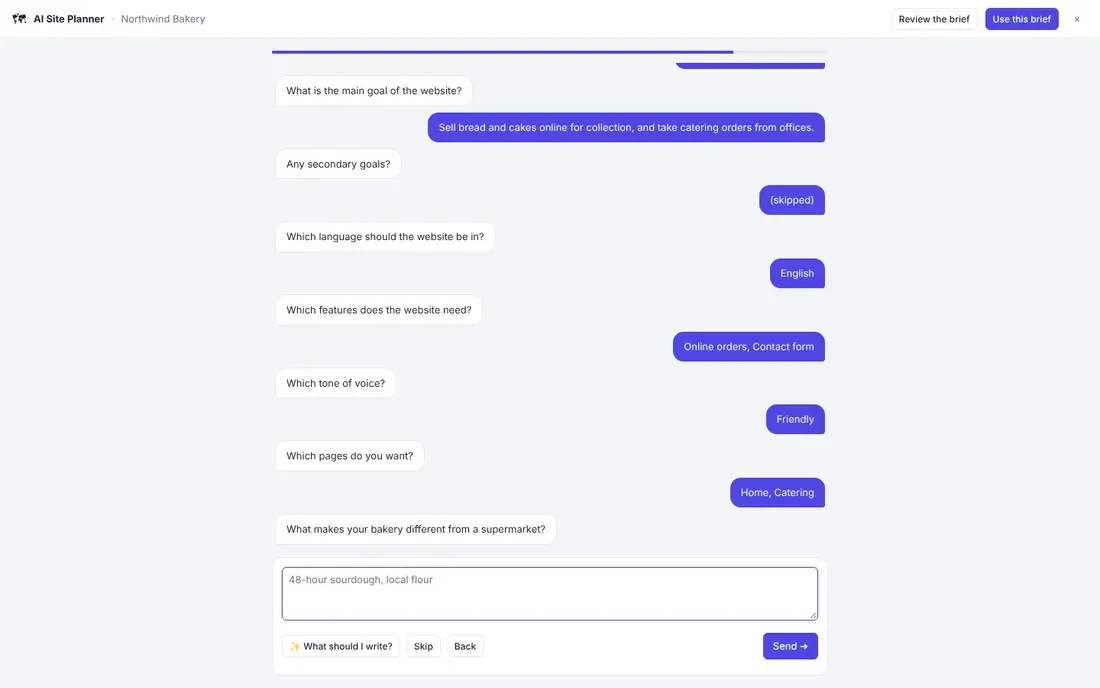
Click a suggestion or type your own answer. Suggestions marked + can be combined. If you're stuck, ✨ What should I write? drafts an answer for you. At the end the AI may ask a few follow-up questions. Answer or skip them, then click Yes, I'm ready — plan my site. You can also click Use this brief at any point.
Already have notes, an email or a client brief? Choose Use an existing brief, then paste it or open a text file, and the AI fills in the brief for you. Review the brief lets you change any answer before planning.
Step 2: Shape the sitemap
The planner turns your brief into a sitemap. Each page is a column listing its sections and their headlines.
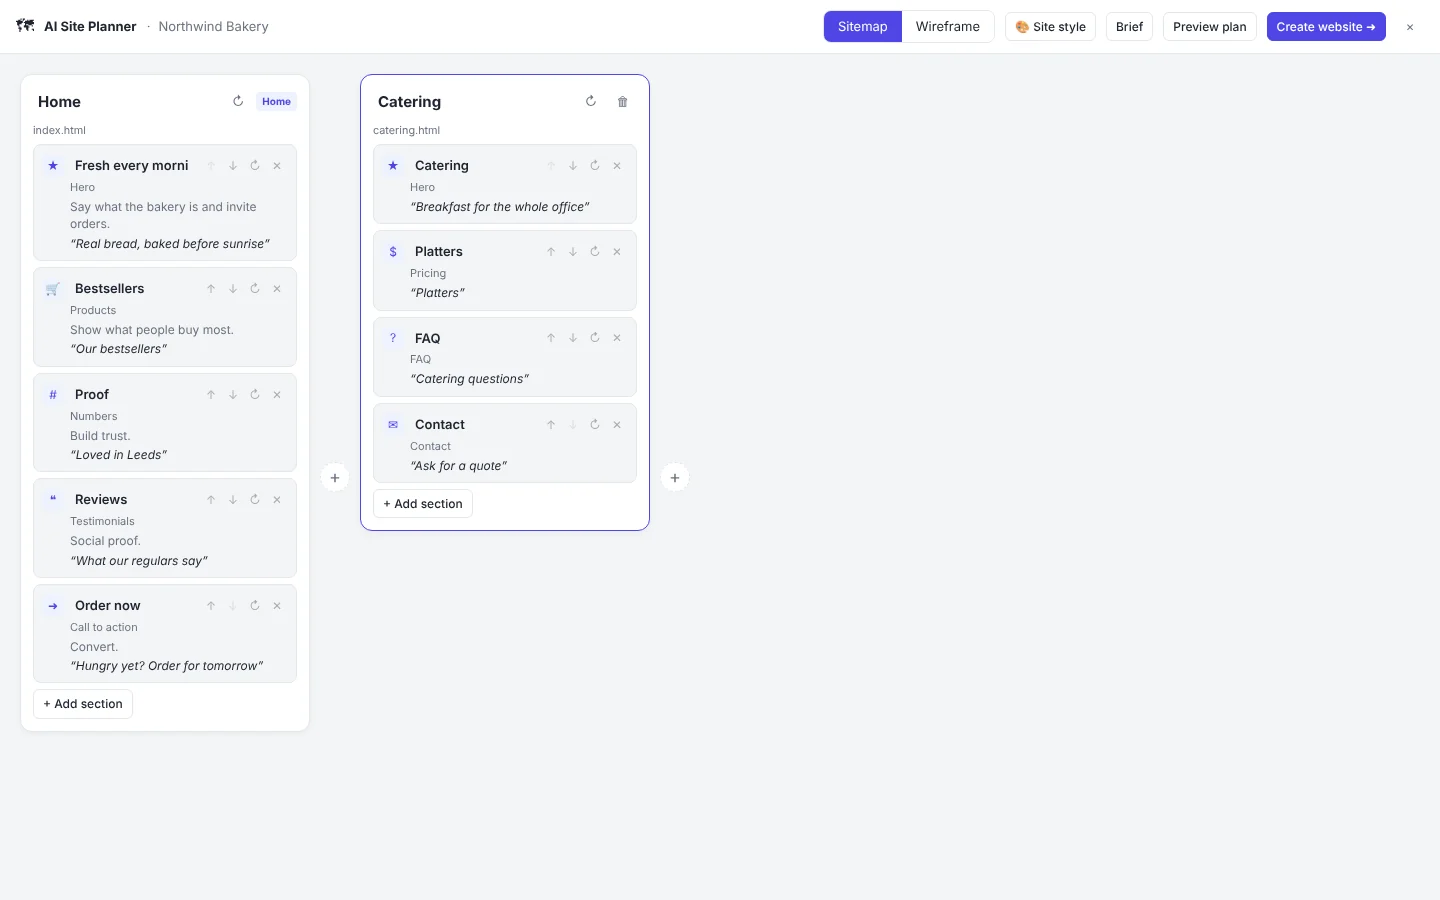
Everything is editable:
- Rename pages and sections by typing over them, and reorder sections with the arrows.
- ↻ Regenerate a single section or a whole page.
- ✕ and the bin delete sections and pages. The home page always stays.
- + Add section asks what kind of section you want and writes it.
- The + between pages adds a new page planned from your brief. Give it a clear name and the AI does the rest.
Step 3: Check the wireframes
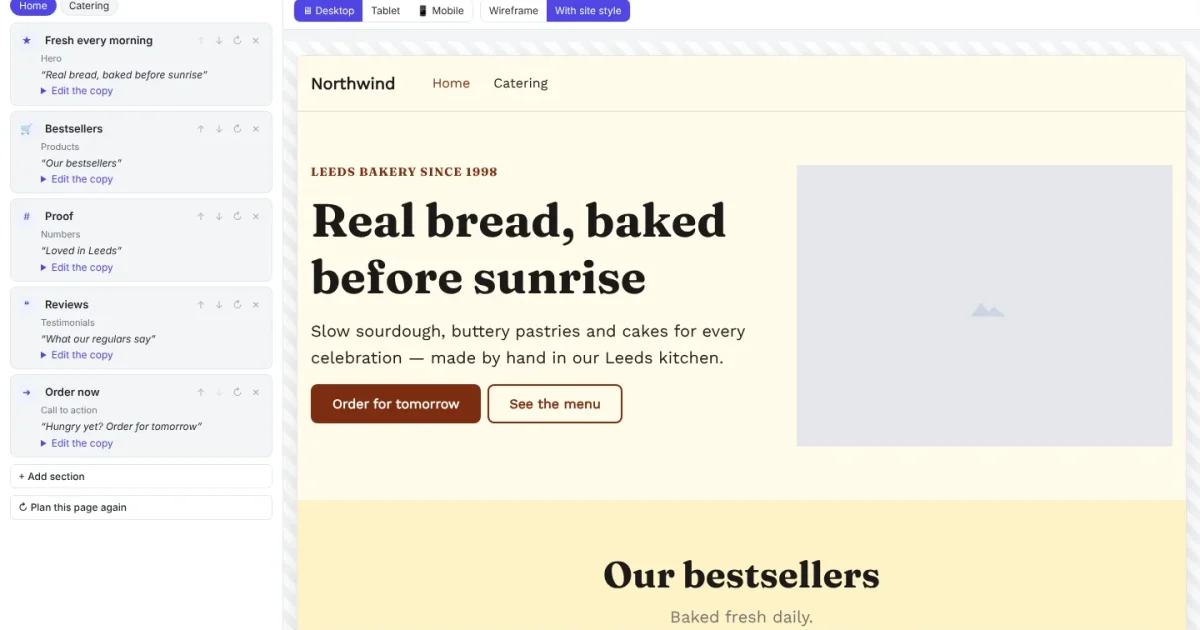
Next, the planner draws every page with its real copy, not lorem ipsum. Switch between Desktop, Tablet and Mobile, and view each page in greys (Wireframe) or With site style.
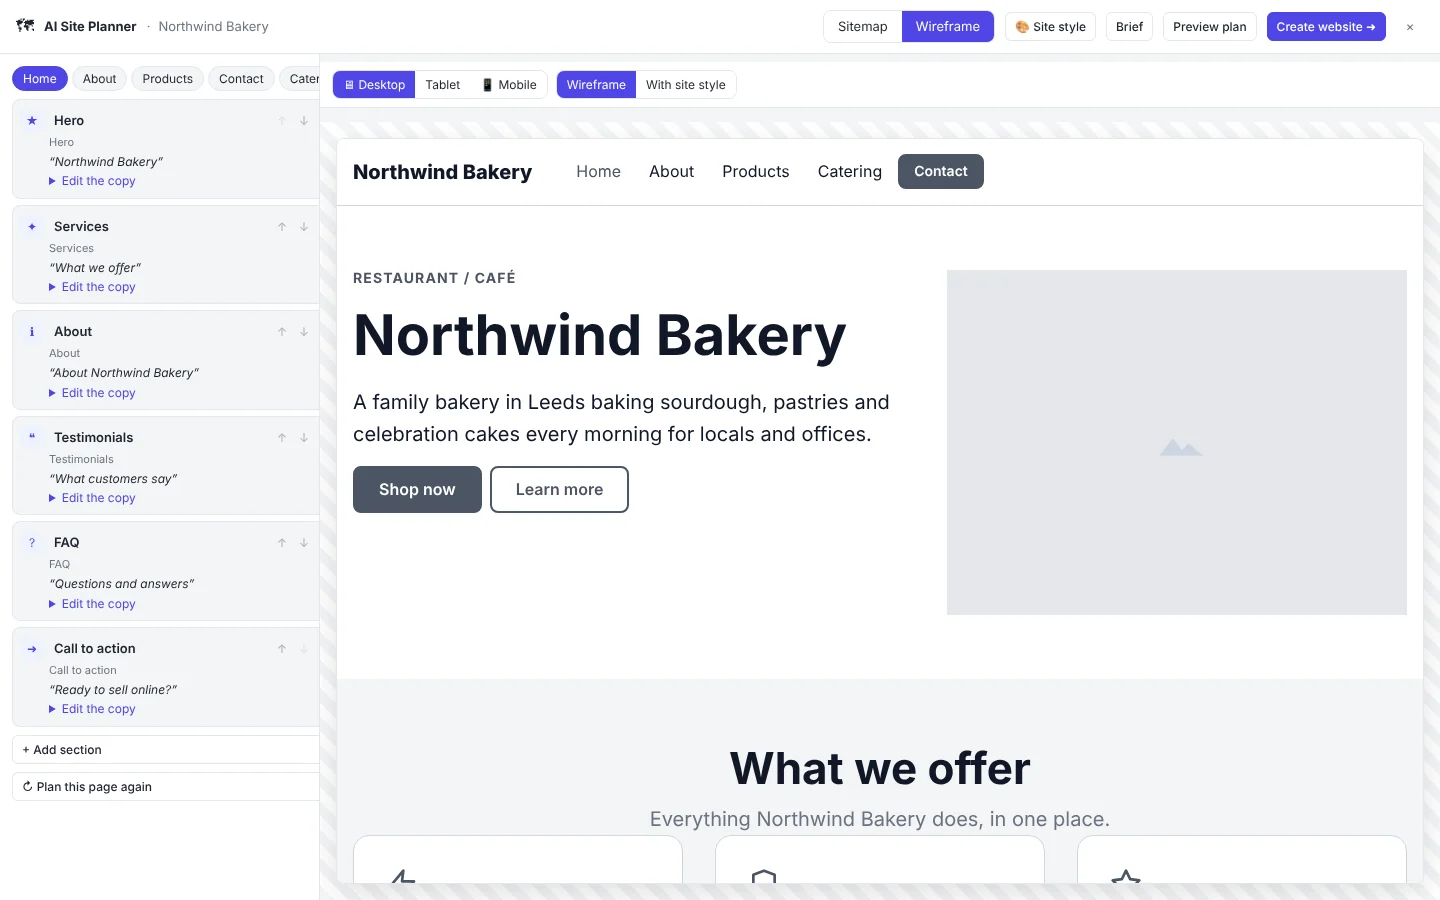
To change the words, open Edit the copy on any section and update its heading, text and items. The drawing updates as you type.
Step 4: Choose a site style
Pick the look of the site in one dialog:
- Colours: start from a preset or set primary, secondary, accent, text, background and surface colours one by one.
- Fonts: choose a heading and text pair, or any Google font.
- Logo: use logo text or upload an image.
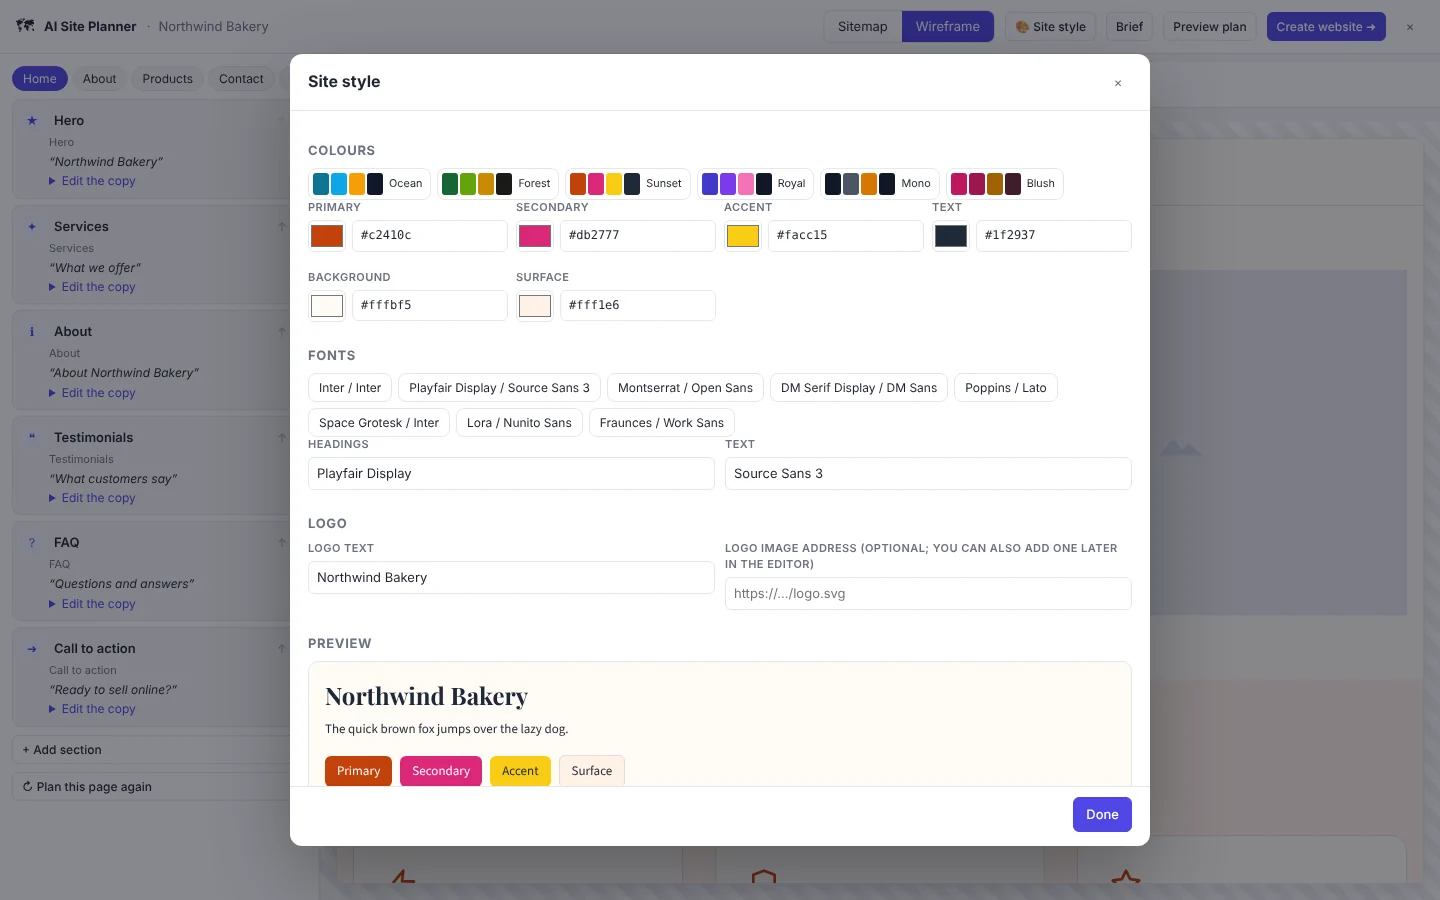
Not sure what fits? ✨ Suggest a style with AI picks colours and fonts from your brief, and a live preview shows the result.
Step 5: Create the website
When the plan looks right, click Create website. Canvasly builds a normal project from it, with:
- every page, with its sections made of real units: hero, services, products, numbers, testimonials, prices, FAQ, team, timeline, gallery, contact form, map and more
- the site header with your logo and menu, and the footer
- your colours and fonts
- page titles and descriptions for search engines
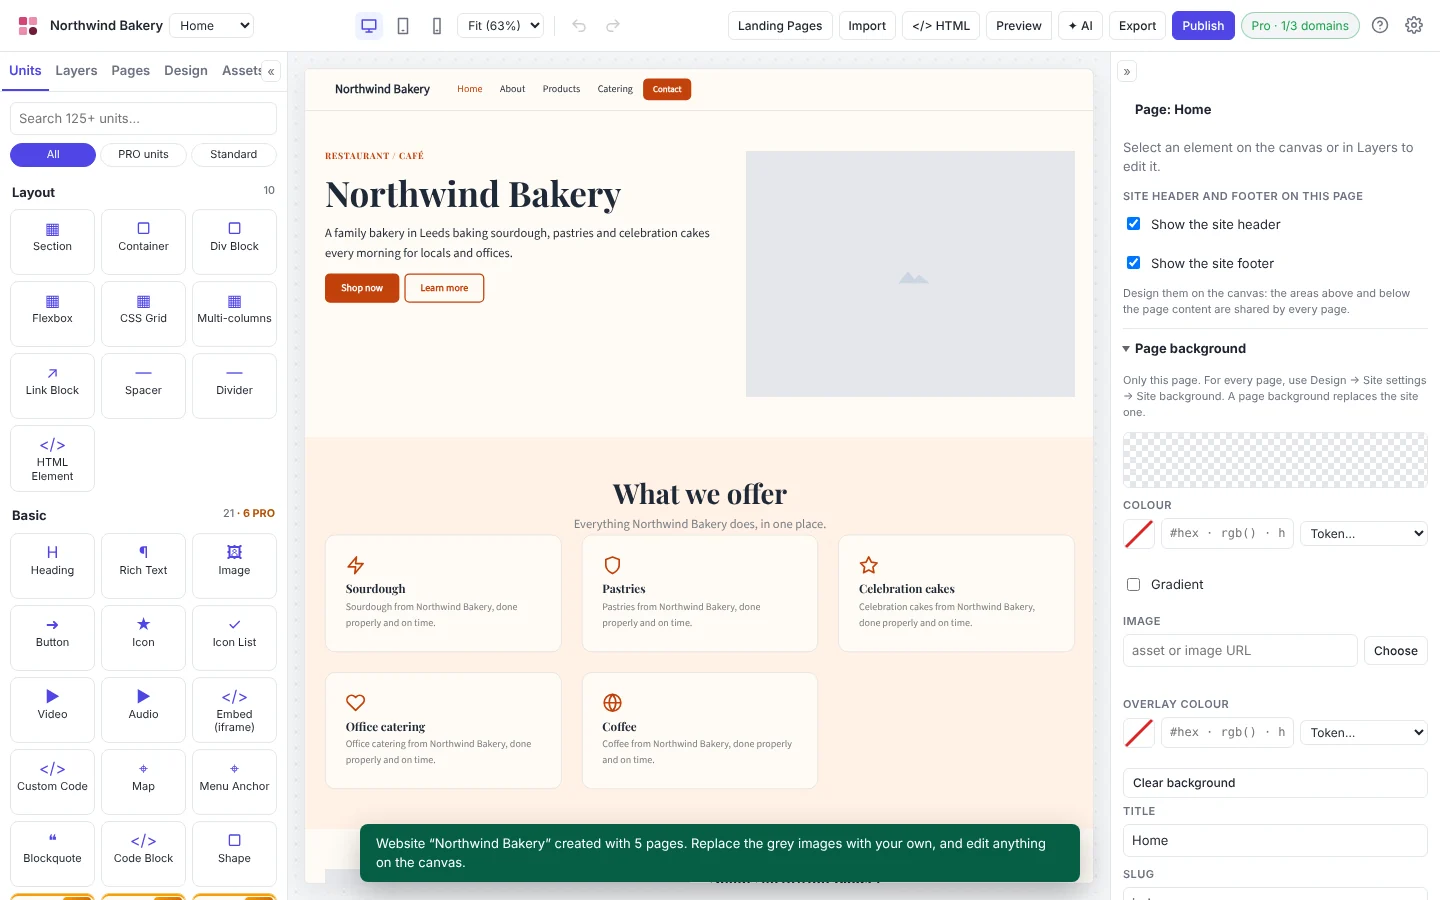
It's not a locked template or a screenshot. Replace the grey placeholder images with your own and edit anything on the canvas, as in any other Canvasly project. When you're done, publish or export it as static HTML, WordPress, React (Next.js), Astro or Payload CMS.
Share the plan with a client before you build
Agencies and freelancers can get sign-off before any design work. Preview plan shows the brief, the site style and the sitemap as one document. Copy it, or download it as Markdown or JSON, and send it to your client for approval.
Do you need an AI key?
No. The planner uses the AI provider and key from Settings → AI: Anthropic Claude, OpenAI (or any OpenAI-compatible service), Google Gemini or Azure OpenAI. Your keys stay on your computer.
Without a key, the built-in planner still makes a complete plan from your answers, with generic copy you then rewrite.
FAQ
Do I need an AI key to use the Site Planner? No. With a key, the AI writes the plan and the copy. Without one, the built-in planner makes the plan from your answers, with generic copy for you to rewrite.
Can I start from a client brief or meeting notes? Yes. Choose Use an existing brief, then paste notes, an email or a client brief, or open a text file. The AI fills in the brief for you.
Can I share the plan with a client before building? Yes. Preview plan shows the brief, site style and sitemap as one document, which you can copy or download as Markdown or JSON.
What does Create website build? A normal Canvasly project: every page with sections made from real units, the header and footer, your colours and fonts, and SEO titles and descriptions. Everything stays editable on the canvas.
Try the AI Site Planner
The AI Site Planner is included in Canvasly Web Studio 2.6. Try Canvasly free for 7 days, read the AI Site Planner guide, or see more AI features and plans and prices.