
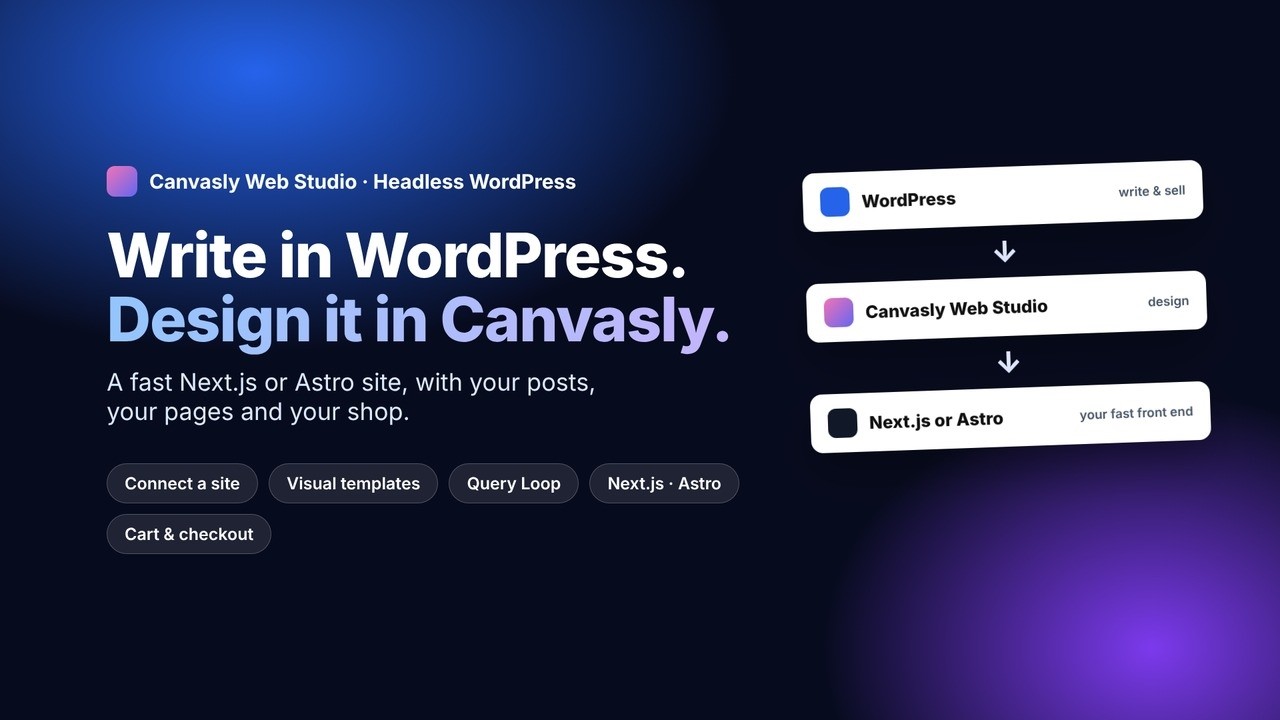
Design in Canvasly. Edit in WordPress. Serve a fast website. This guide walks you through every step of a "headless WordPress" setup with Canvasly Web Studio. You don't need to write any code. If you can install a WordPress plugin and copy and paste a few values, you can do this.
What "headless WordPress" means (in plain words)
On a normal WordPress site, WordPress does two jobs: it stores your content and it builds the pages visitors see (with a theme).
In a headless setup, WordPress keeps only the first job:
- You and your editors keep writing posts and pages in the WordPress admin, exactly as today.
- Canvasly Web Studio designs the website, and exports it as a modern Next.js or Astro website.
- That website reads your posts, pages and products from WordPress and shows them in your design.
Why do this? The website visitors see is much faster, more secure (visitors never touch WordPress) and looks exactly as you designed it, while editors keep the WordPress they know.
Before you start: what you need
| What | Why | Cost |
|---|---|---|
| Canvasly Web Studio 2.8.1 (or newer) | You design the site and export it | Your licence |
| A WordPress site you can log in to as an administrator | Where your content lives | You already have it |
| A free Vercel account (vercel.com) or a free Netlify account (netlify.com) | Where the new website is hosted | Free plans are enough to start |
| (Astro only) A free GitHub account and GitHub Desktop | Lets Netlify or Vercel rebuild your site automatically | Free |
| (Optional) WooCommerce or Sidcraft Commerce | If you also sell products | — |
Tip: Many people keep WordPress on a sub-address such as
cms.yourdomain.comand put the new website onwww.yourdomain.com. Your hosting company can create the sub-address for you. This is optional: your current WordPress address works too.
Next.js or Astro? Pick one
You don't need to understand either technology. Choose by what you need:
| Next.js (recommended for most) | Astro | |
|---|---|---|
| Pages update the moment you publish in WordPress | ✅ Yes, only the changed pages | ⚠️ The whole site rebuilds (usually 1–3 minutes) |
| "Preview on front end" button for drafts | ✅ Yes | ❌ Previews stay in WordPress |
| Shop with cart and checkout on your site | ✅ Yes, WooCommerce even without the plugin | ✅ Yes, with the plugin |
| Easiest hosting | Vercel, one click from Canvasly | Netlify or Vercel, through GitHub |
| Can be hosted anywhere as plain files | ❌ Needs a Node.js host (Vercel, Netlify) | ✅ Yes |
Not sure? Choose Next.js and Vercel. It's the shortest path and it's what this guide follows first. Astro steps are given separately.
Watch it first (2 minutes)
Step 1: Get WordPress ready (5 minutes)
- Check that WordPress shares its content. In your browser, open your WordPress address followed by
/wp-json/, for examplehttps://cms.yourdomain.com/wp-json/. You should see a page full of text in curly brackets{ … }. That's good: it means the REST API is on.- If you see an error or a "forbidden" page, a security plugin (Wordfence, iThemes Security, "Disable REST API" …) may be blocking it. In that plugin's settings, allow public read access to the REST API.
- Use pretty permalinks. In WordPress go to Settings → Permalinks and choose Post name, then Save Changes. (Any option except "Plain" works.)
- Make sure your posts have featured images and excerpts. Not required, but your design will look better with them.
Step 2: Connect WordPress to Canvasly (2 minutes)
- Open Canvasly Web Studio and open (or create) your project.
- In the menu choose File → Connect WordPress Site… (you can also click Connect WordPress… in the Data panel on the left).
- Type your WordPress address, for example
https://cms.yourdomain.com, and click Connect. - Canvasly lists what it found: Posts, Pages, any custom post types and, if you run a shop, Products. Next to each one you can change its address on the new website:
- Posts at
/blog/your-post/(you can type another word instead ofblog) - Pages at
/your-page/(leave it empty) - Products at
/shop/your-product/
- Posts at
- Leave Add template pages ticked and click Add to the project.
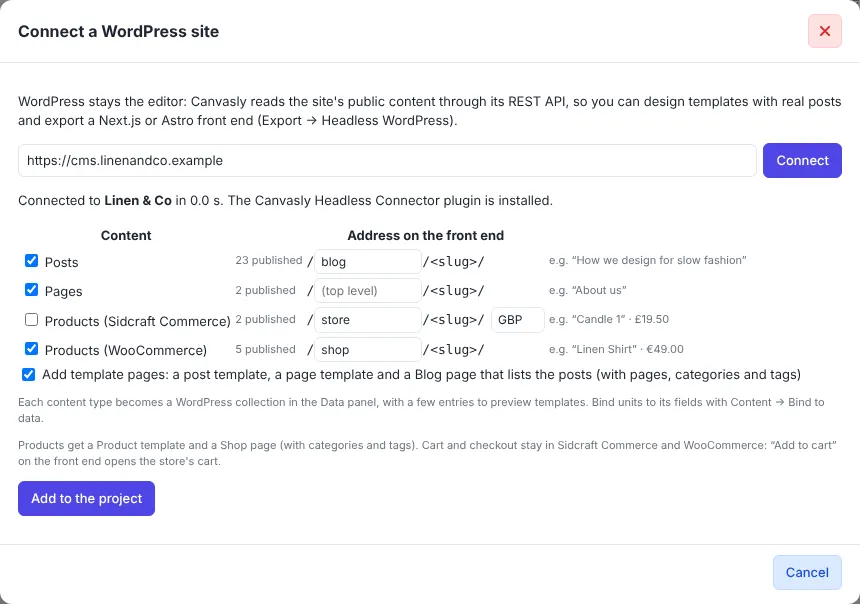
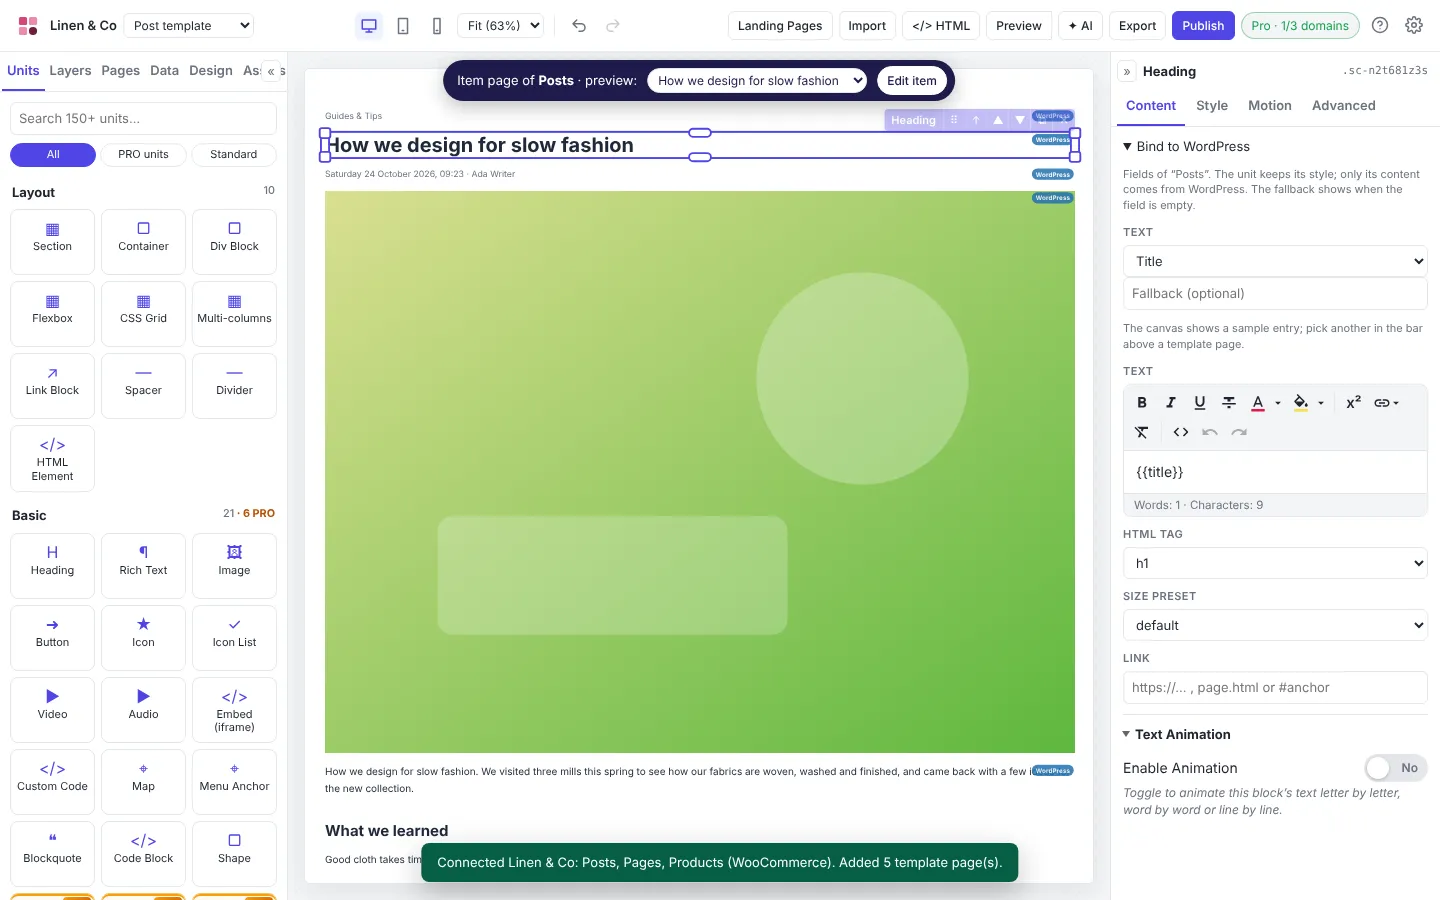
Canvasly adds a Post template, a Page template, a Blog page (and a Product template and a Shop page for stores). They already show your real posts.
Desktop app only for local sites: if your WordPress runs on your own computer (for example
http://mysite.local), connect from the Canvasly desktop app. A studio served over a network refuses local addresses for safety.
Step 3: Design your templates (as long as you like)
Design these pages like any other Canvasly page: fonts, colours, spacing, animations. Everything is available.
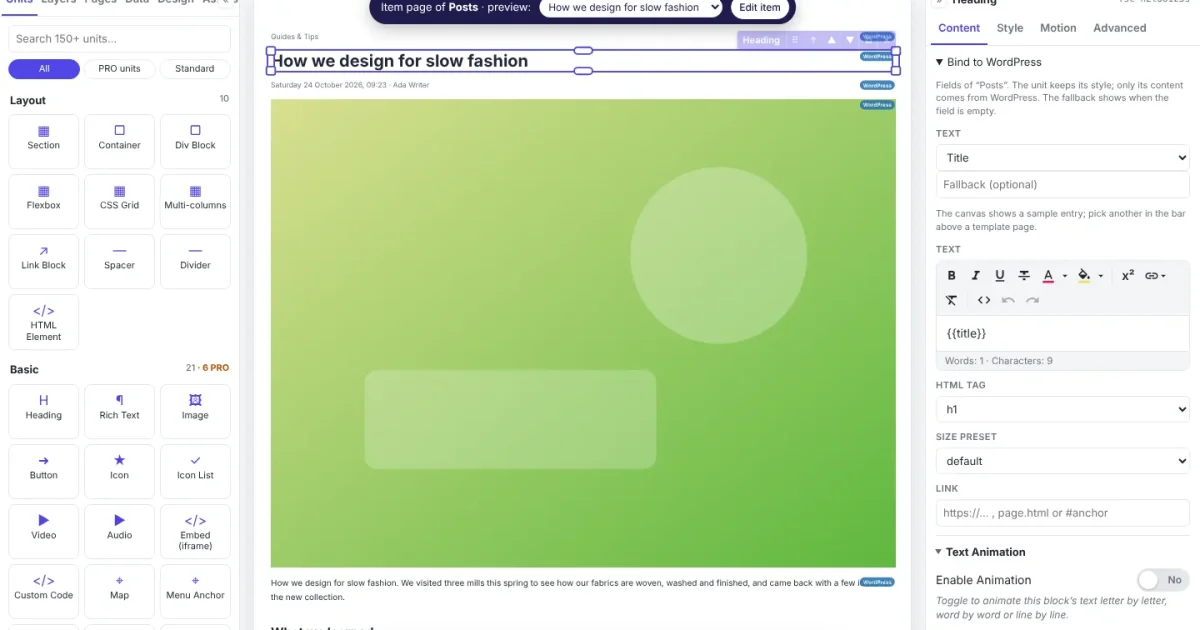
- To show WordPress content in a unit: select it, open Content → Bind to WordPress, and pick a field: Title, Excerpt, Content, Featured image, Date, Author, Category, Front-end link … Type a fallback for posts where the field is empty. Bound units show a small blue WordPress badge.
- To preview another post in a template, pick it in the bar above the page.
- To show a list of posts anywhere (for example "Latest 3 posts" on your home page), drop a Query Loop unit, design one item inside it, and set How many, Order or a category filter. On the Blog page the loop is set to The page's own list, so it also works for category pages, tag pages and page 2, 3 …
Good to know: the post's body text gets Canvasly's Block styles, so headings, quotes, galleries, buttons and tables written in the WordPress editor use your fonts and colours automatically.
Step 4: Export or publish your website
Option A: Next.js on Vercel (easiest)
First, get the project file and the plugin:
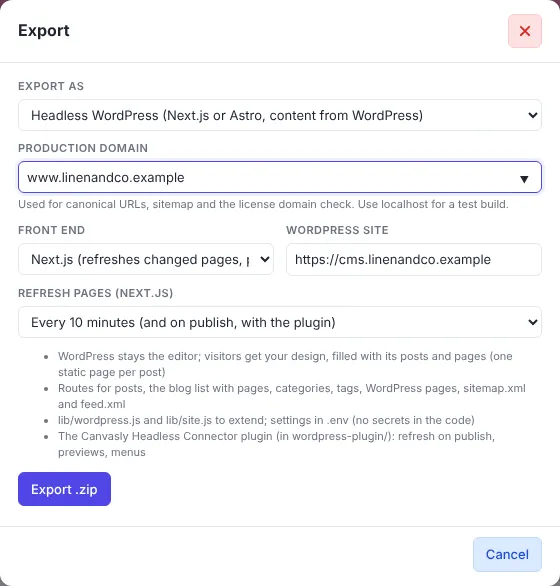
- Click Export at the top of Canvasly.
- In Export as, choose Headless WordPress (Next.js or Astro, content from WordPress).
- Production domain: your website's address, e.g.
www.yourdomain.com. - Front end: Next.js. WordPress site: your WordPress address. Refresh pages: keep Every 10 minutes.
- Click Export .zip and save it. Canvasly checks your WordPress site first; if it can't be reached, it tells you why instead of producing a broken site.
Then publish it to Vercel straight from Canvasly:
- In Vercel, open Account Settings → Tokens, create a token and copy it.
- In Canvasly click Publish, choose Vercel, paste the Access token, type a Project name (e.g.
my-website) and set Upload as to Headless WordPress (Next.js, content from WordPress). - Click Publish. Vercel builds your site; after a minute or two you get an address such as
my-website.vercel.app. Open it: your design, filled with your WordPress posts. 🎉 - To use your own domain, in Vercel open the project, then Settings → Domains → Add, and follow the instructions (usually one DNS record at your domain registrar).
Option B: Astro on Netlify (or Vercel) through GitHub
Astro sites are plain files, so they need to be rebuilt when content changes. GitHub lets the host do that automatically.
- In Canvasly, Export as Headless WordPress, with Front end: Astro. Save the zip and unzip it (right-click → Extract All on Windows, double-click on Mac).
- Install GitHub Desktop (desktop.github.com) and sign in.
- In GitHub Desktop: File → Add Local Repository, choose the unzipped folder, click create a repository, then Publish repository (you can keep it private).
- In Netlify: Add new site → Import an existing project → GitHub, pick your repository and click Deploy. Netlify detects Astro by itself.
- A few minutes later your site is live at an address like
my-website.netlify.app. Add your own domain under Domain management.
Prefer Vercel for Astro? Same idea: Add New → Project → Import your GitHub repository, then Deploy.
Step 5: Add the settings (environment variables)
Your website needs to know where WordPress is. Canvasly already wrote the public settings into the project, so the site works right away. The optional secret settings unlock instant updates and previews.
Where to add them:
- Vercel: your project → Settings → Environment Variables
- Netlify: your site → Site configuration → Environment variables
| Name | What to put | Needed for |
|---|---|---|
WORDPRESS_URL |
Your WordPress address, e.g. https://cms.yourdomain.com |
Already set by Canvasly; change it here if WordPress moves |
SITE_URL |
Your website's address, e.g. https://www.yourdomain.com |
Correct links, sitemap and feed |
REVALIDATE_SECRET |
A long random code (made in Step 6) | Next.js: instant updates when you publish |
PREVIEW_SECRET |
Another long random code (made in Step 6) | Next.js: "Preview on front end" |
WP_PREVIEW_USER |
Your WordPress username | Next.js: previews of drafts |
WP_APP_PASSWORD |
An Application Password (Step 7) | Next.js: previews of drafts |
After adding or changing variables, redeploy: in Vercel open Deployments, click the ⋯ menu on the latest one and choose Redeploy; in Netlify choose Deploys → Trigger deploy.
Your secrets are safe: they only exist in your host's settings and in WordPress. Canvasly never writes them into the exported files.
Step 6: Install the Canvasly Headless Connector plugin in WordPress
The plugin is free and included in your export. It updates your website when you publish, adds previews, and (for shops) connects the cart.
- In the unzipped export, find
wordpress-plugin/canvasly-headless-connector.zip. - In WordPress go to Plugins → Add New → Upload Plugin, choose that zip, click Install Now, then Activate.
- Open Settings → Canvasly Headless and fill in:
- Front-end address: your new website, e.g.
https://www.yourdomain.com - Front end: Next.js or Astro
- Next.js: next to Refresh secret (REVALIDATE_SECRET) click Generate, copy the code, and paste it into your host as
REVALIDATE_SECRET(Step 5). Do the same for Preview secret (PREVIEW_SECRET). - Astro: paste a Deploy hook URL. Create one in Netlify under Site configuration → Build & deploy → Build hooks → Add build hook, or in Vercel under Settings → Git → Deploy Hooks.
- Links: keep "View post" and other links open the front end ticked.
- This site's own pages: choose Keep them out of search engines so Google only lists your new website. (Logged-in editors still see WordPress normally.)
- Public menus: tick menus you want to use on the website (optional).
- Front-end address: your new website, e.g.
- Click Save Changes, then redeploy your website once (Step 5) so it picks up the secrets.
Now, when you publish, update, trash or delete a post, your website updates by itself: within seconds with Next.js, after a short rebuild with Astro. The Rebuild now button at the bottom of the settings page refreshes everything at once.
Step 7 (Next.js): Turn on draft previews
- In WordPress open Users → Profile, scroll to Application Passwords, type a name like
Website previewsand click Add New Application Password. - Copy the password it shows (it's shown only once).
- In your host's environment variables add
WP_PREVIEW_USER(your username) andWP_APP_PASSWORD(that password), then redeploy.
In the WordPress editor, Preview now opens your draft in your real design on the new website. Previews are never cached or shown to search engines.
Step 8 (optional): Your shop with WooCommerce or Sidcraft Commerce
If your WordPress runs WooCommerce or Sidcraft Commerce, Step 2 also offers your Products. Connect them and Canvasly adds a Product template and a Shop page with categories and tags. Bind units to Price, Sale badge, Stock status, Add to cart link and more.
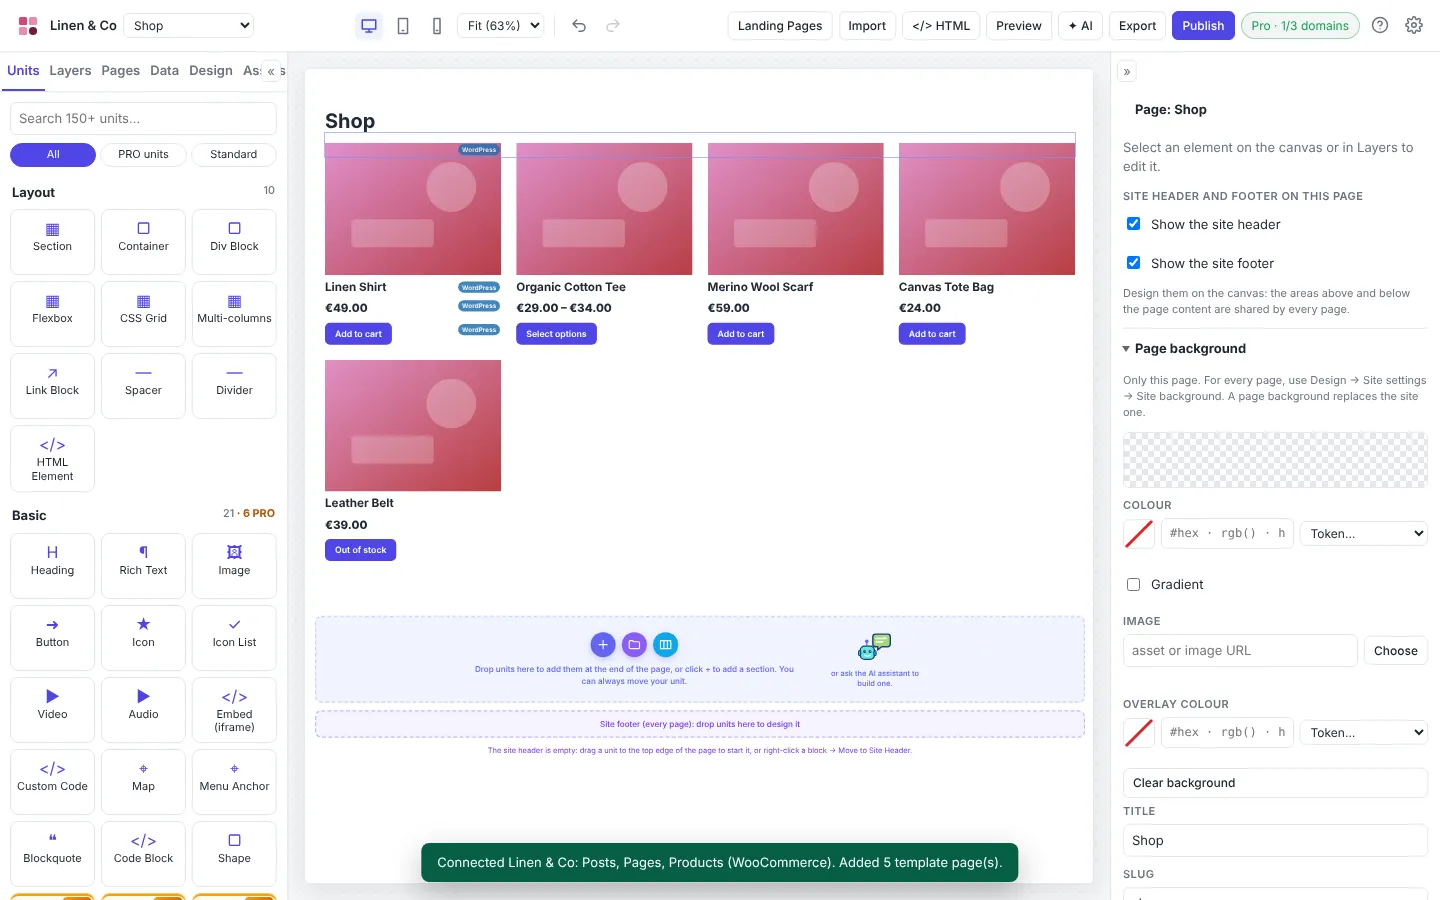
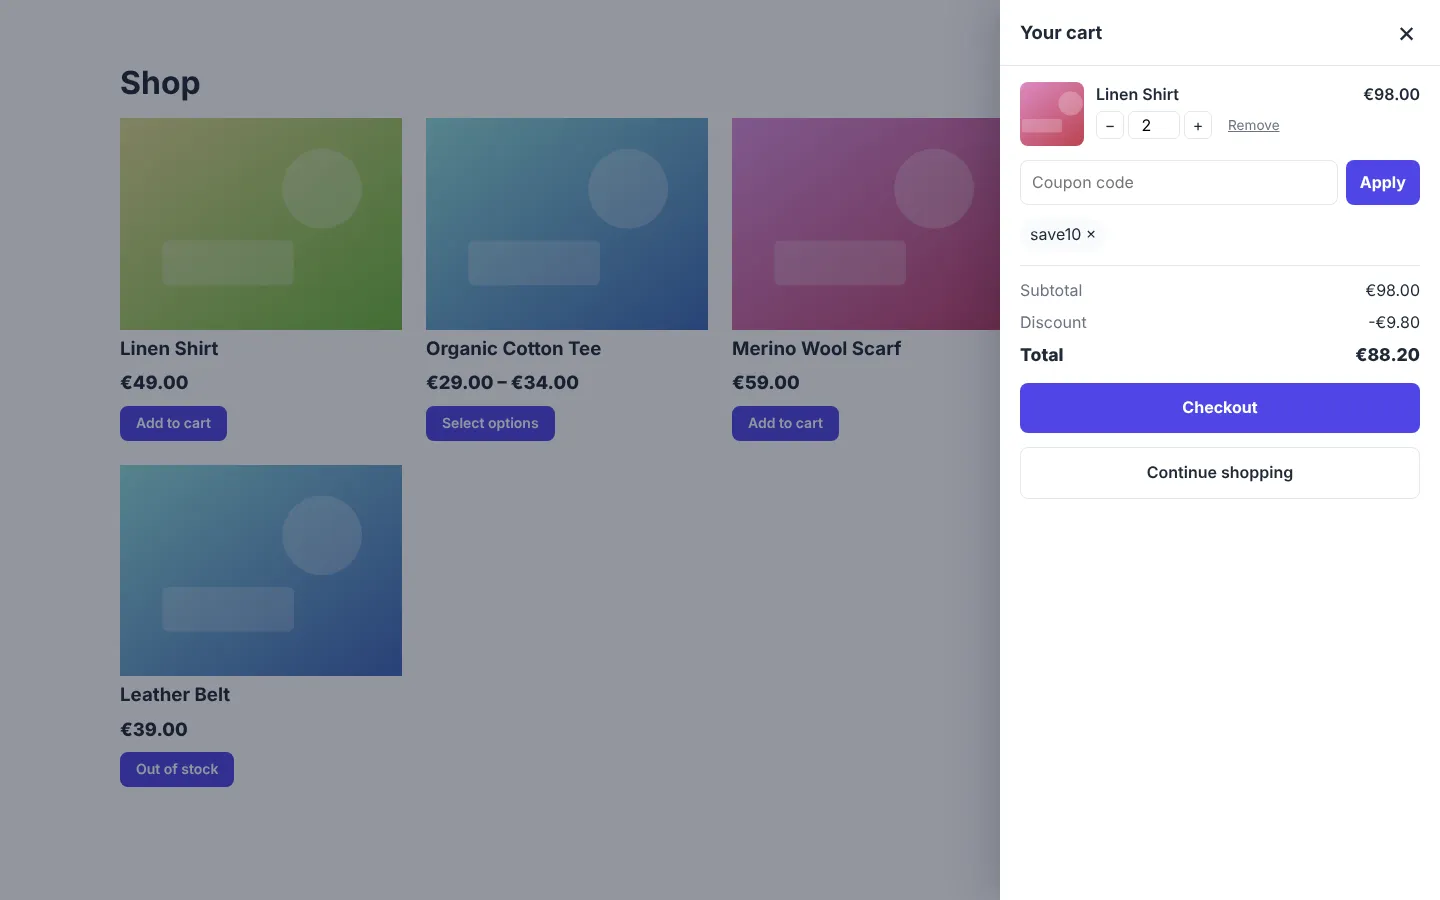
On the exported website, shoppers get a cart drawer on your own site:
- Add to cart without leaving the page; products with sizes or options show a small options form first.
- Change quantities, remove items, apply coupons, see shipping, tax and the total.
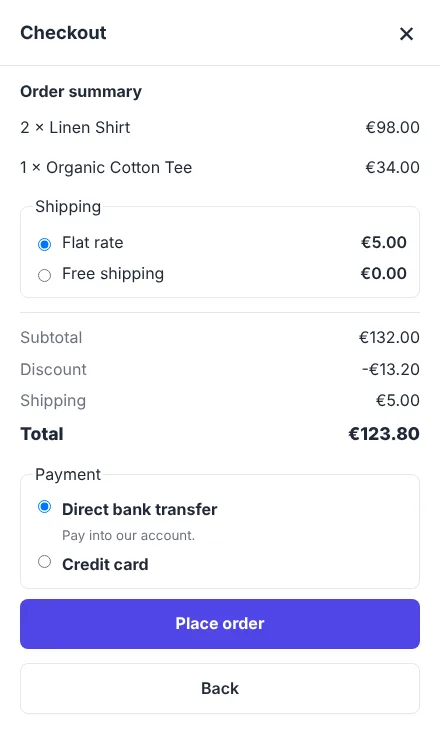
- Checkout: email and address, shipping choice, then the payment method.
- Bank transfer, cheque, cash on delivery and PayPal-style payments are completed from your website, and the shopper comes back to a thank-you message on your site.
- Card payments (Stripe and similar) continue on your store's secure checkout page with the same cart, so card details never pass through your website.
What you need for the shop: with Next.js, a WooCommerce cart works even without the plugin (card methods need it). With Astro, or with Sidcraft Commerce, install the Connector plugin (Step 6). Your stock, taxes, coupons and order emails keep working exactly as in your store.
Want the cart icon in your header? Add a button to your header in Canvasly and set its link to #cart. To show the number of items, give a text unit the attribute data-canvasly-cart-count (Advanced → Attributes). Otherwise a round cart button appears in the corner once something is in the cart.
Step 9: Check that everything works
Go through this list once:
- ☐ Your home page, /blog/ and a post open on your new address.
- ☐ Edit a post title in WordPress and click Update. Next.js: refresh your website after a few seconds. Astro: after the rebuild (watch it in Netlify/Vercel).
- ☐ (Next.js) Create a draft and click Preview: it opens in your design.
- ☐ Your website's /sitemap.xml lists your posts.
- ☐ (Shop) Add a product to the cart, try a coupon, and place a test order (most stores have a test or "cash on delivery" mode).
- ☐ Search for your site on Google after a few days: the new address should appear, not the WordPress one.
Troubleshooting
"Could not reach WordPress" when connecting or exporting. Check the address (open it in your browser), and that the site is online. Try with https://.
"A security plugin may be blocking the REST API." Open your security plugin's settings and allow public (read-only) access to the REST API, or to /wp-json/wp/v2/.
My changes in WordPress don't appear. Next.js: check that REVALIDATE_SECRET is the same in WordPress and in your host, and that you redeployed after adding it. Without the plugin, pages still refresh on the schedule you chose (e.g. every 10 minutes). Astro: check the deploy hook URL in the plugin; a rebuild takes a few minutes.
Preview says the link expired or opens an error. Open the preview again from WordPress (links are valid for one hour). Check PREVIEW_SECRET, WP_PREVIEW_USER and WP_APP_PASSWORD.
Images don't show. They stay in your WordPress media library. Make sure WordPress is online and its address in WORDPRESS_URL is correct.
A block from another plugin looks plain. Blocks that need their own JavaScript show their simple HTML version. Canvasly's export report lists them, so a developer can add them if needed.
I changed my design. Export again from Canvasly and redeploy (Next.js: Publish → Vercel again; Astro: replace the files in your GitHub folder and click Commit and Push in GitHub Desktop). Your content and settings stay as they are.
Summary
- Prepare WordPress (REST API on, pretty permalinks).
- File → Connect WordPress Site… in Canvasly.
- Design the templates; bind units with Content → Bind to WordPress.
- Export as Headless WordPress, then publish to Vercel (Next.js) or through GitHub to Netlify (Astro).
- Add the settings in your host.
- Install the Canvasly Headless Connector plugin, generate the secrets, paste them in your host.
- (Next.js) Add an Application Password for previews.
- (Optional) Connect your WooCommerce or Sidcraft Commerce shop.
That's it: your team keeps writing in WordPress, and your visitors get a fast, beautifully designed website that updates itself. Happy publishing!