Headless WordPress: design in Canvasly, edit in WordPress, serve a fast website
Keep WordPress as the place where your team writes posts, pages and products. Design the website in Canvasly, bind it to that content, and export a Next.js or Astro website that reads WordPress, loads fast and updates itself when you publish. With WooCommerce or Sidcraft Commerce, shoppers buy on your website too.
Updated . Covers Canvasly Web Studio 2.8.1 and the Canvasly Headless Connector plugin 1.3.
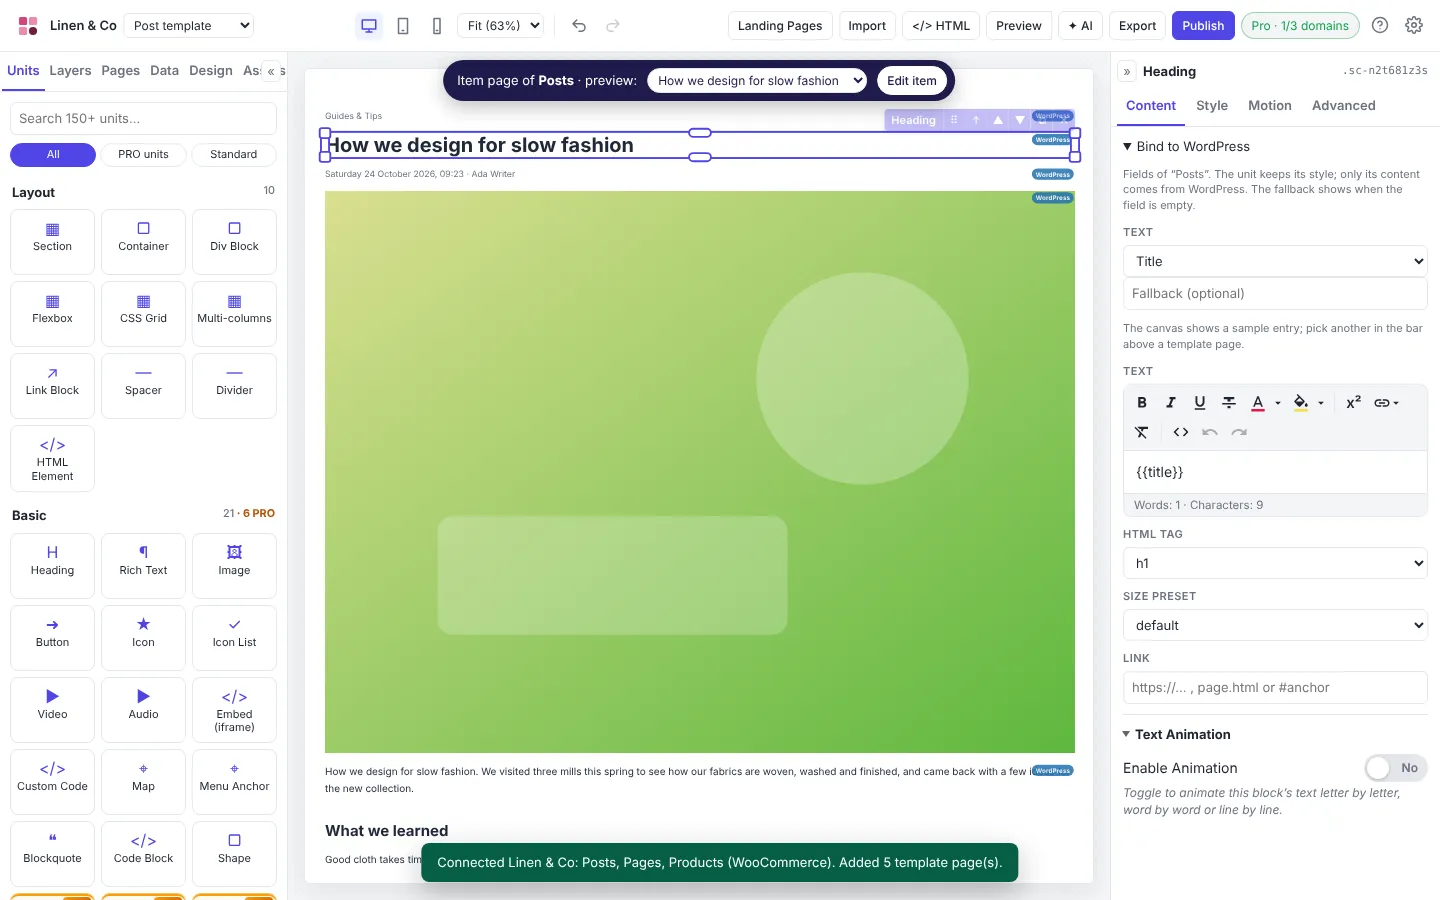
Video demo: connect WordPress, design templates bound to your posts and products, export to Next.js or Astro, and check out on your own website. Watch on YouTube.A post template: every unit keeps its style; only its content comes from WordPress.
Why go headless
Your editors change nothing. They write in the WordPress admin they know, with the block editor, media library, categories, SEO plugins and roles.
Your visitors get a fast website. One static page per post, only the CSS and JavaScript each page uses, images that load lazily, and no theme or page builder plugin in the way.
It looks exactly as designed. Post content is styled from your design tokens: headings, quotes, galleries, buttons, tables and embeds follow your fonts and colours.
It is safer. Visitors never reach WordPress; its admin can live on a private address such as cms.yourdomain.com, and no secret is ever written into the exported code.
Next.js or Astro
Next.js
Astro
Updates when you publish
Only the changed pages, in seconds
The site rebuilds (a few minutes)
Draft previews in your design
Yes, with Preview in WordPress
Previews stay in WordPress
Shop: cart and checkout on your site
Yes; WooCommerce even without the plugin
Yes, with the plugin
Easiest hosting
Vercel, published from Canvasly
Netlify or Vercel from GitHub, or any host as plain files
Not sure? Choose Next.js on Vercel.
1 Connect your WordPress site
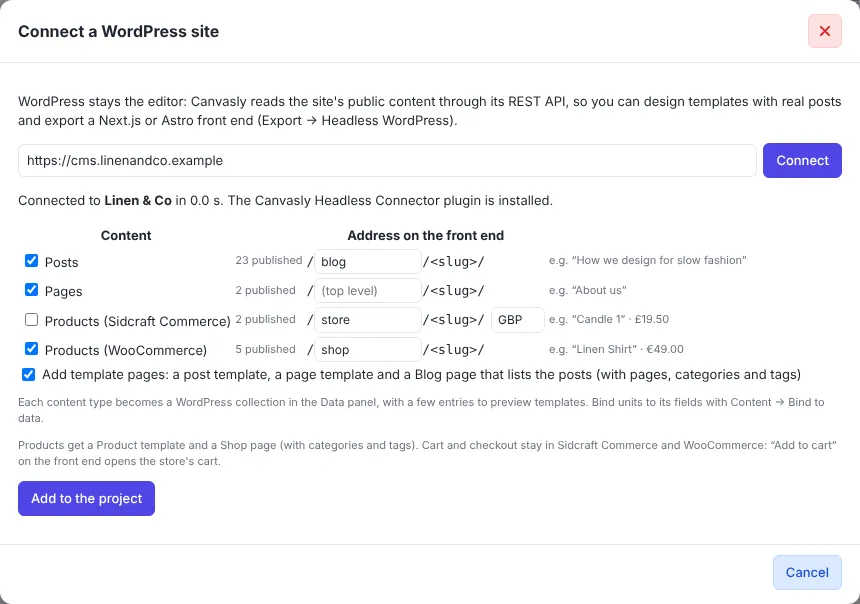
Choose File → Connect WordPress Site… (or Data → Connect WordPress…) and enter the address. Canvasly checks the REST API (/wp-json/) and lists posts, pages, custom post types and, for shops, products, with how many are published and the address each gets on the new website: /blog/your-post/, /your-page/, /shop/your-product/. Leave Add template pages ticked and click Add to the project.
Connecting a site: content types and their addresses on the new website.
If a security plugin blocks the REST API, Canvasly says so and what to allow. Sites on your own computer (such as mysite.local) connect from the desktop app.
2 Design your templates and bind them
Canvasly adds a Post template, a Page template and a Blog page, already showing your real posts. Design them like any page, then select a unit and open Content → Bind to WordPress: title, excerpt, content, featured image, date, author, categories, tags, the post's address, Yoast SEO or Rank Math fields and ACF custom fields, each with a fallback for when it is empty. The bar above a template chooses which entry it previews.
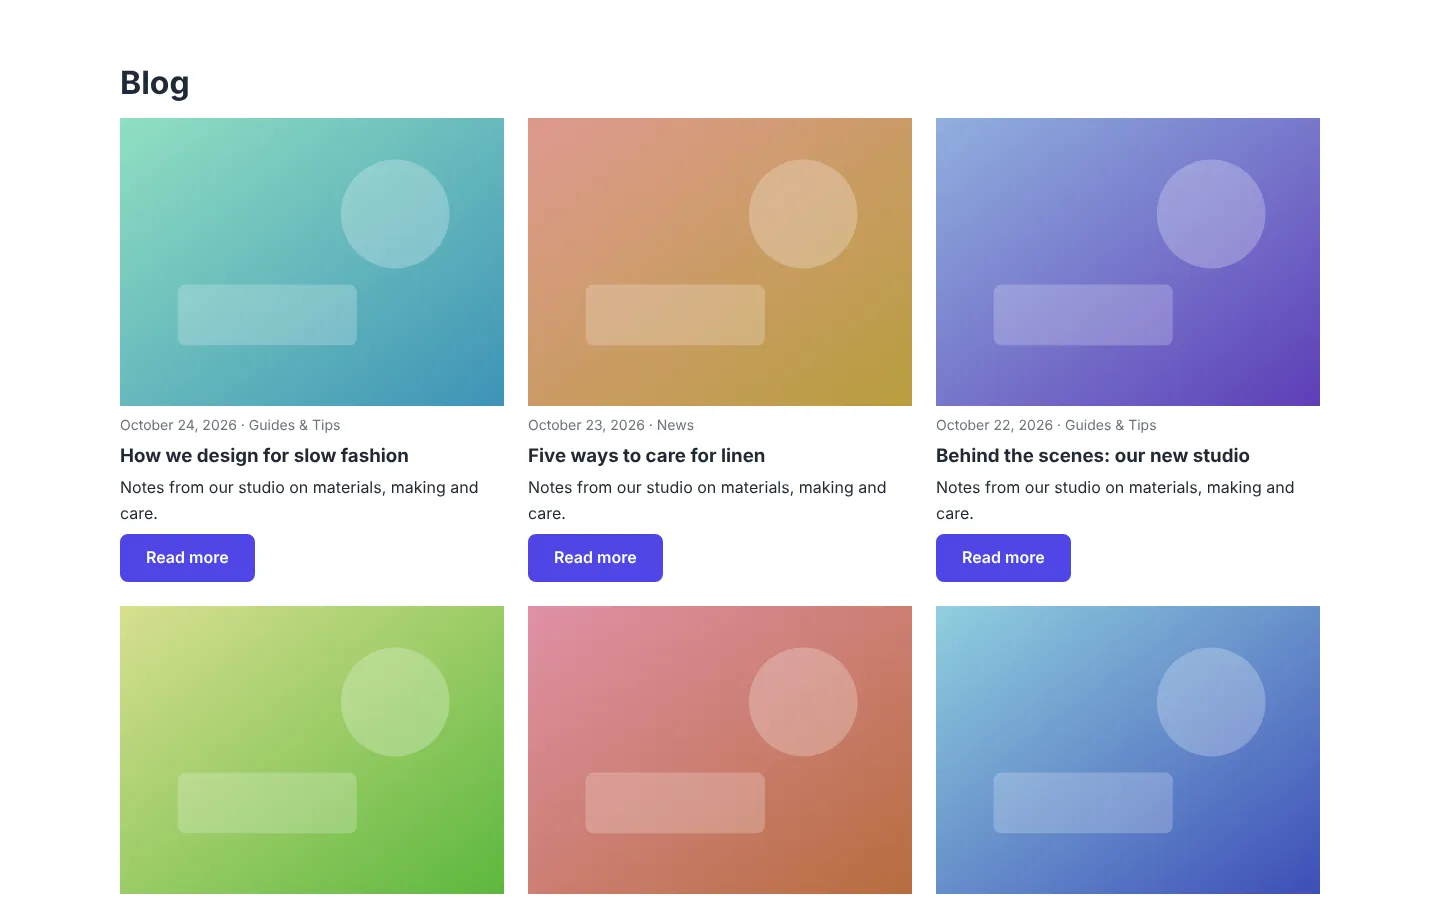
The new Query Loop unit repeats anything you design for each post: “Latest 3 posts” on the home page, a grid of products, or the Blog page's own list with pages, category pages and tag pages.
In any setting, {{title}} or {{excerpt|No summary}} does the same as binding.
The Blog page on the exported website: a Query Loop of your posts.
3 Export or publish
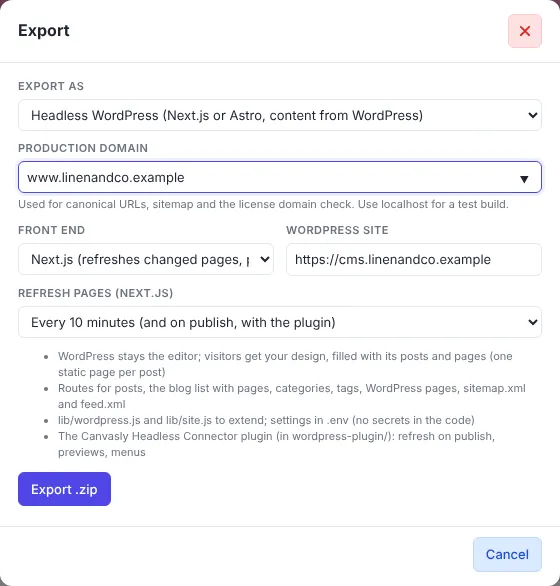
Export → Export as → Headless WordPress, then choose Next.js or Astro, your WordPress address and how often pages refresh. Canvasly checks the WordPress site first: if it cannot be reached, the export stops with the reason, never with a broken project. To put a Next.js site online in one step, use Publish → Vercel with Upload as: Headless WordPress.
Export as Headless WordPress.
The project has every route ready: your designed pages, /blog/ with pages 2, 3…, each post, category and tag pages, WordPress pages, /shop/ and each product, /sitemap.xml and /feed.xml, with structured data for posts (BlogPosting, BreadcrumbList) and products (Product with price and availability). Settings live in environment variables, explained in the README.
4 Install the Canvasly Headless Connector plugin
The free plugin is in your export (wordpress-plugin/canvasly-headless-connector.zip). Install it under Plugins → Add New → Upload Plugin, then open Settings → Canvasly Headless, enter your website's address, click Generate for the two secrets and paste the same values in your host (Vercel or Netlify environment variables). It then:
refreshes your website when a post, page or product is published, updated, trashed or deleted, or its price or stock changes (only the pages that show it, with Next.js; a rebuild through a deploy hook, with Astro);
adds Preview on front end: drafts open in your design, never cached or indexed;
points “View post” links to the new website, shares the menus you choose, and can keep WordPress's own pages out of search engines;
connects the cart and checkout of WooCommerce and Sidcraft Commerce, and has a Rebuild now button.
A shop on your website: WooCommerce and Sidcraft Commerce
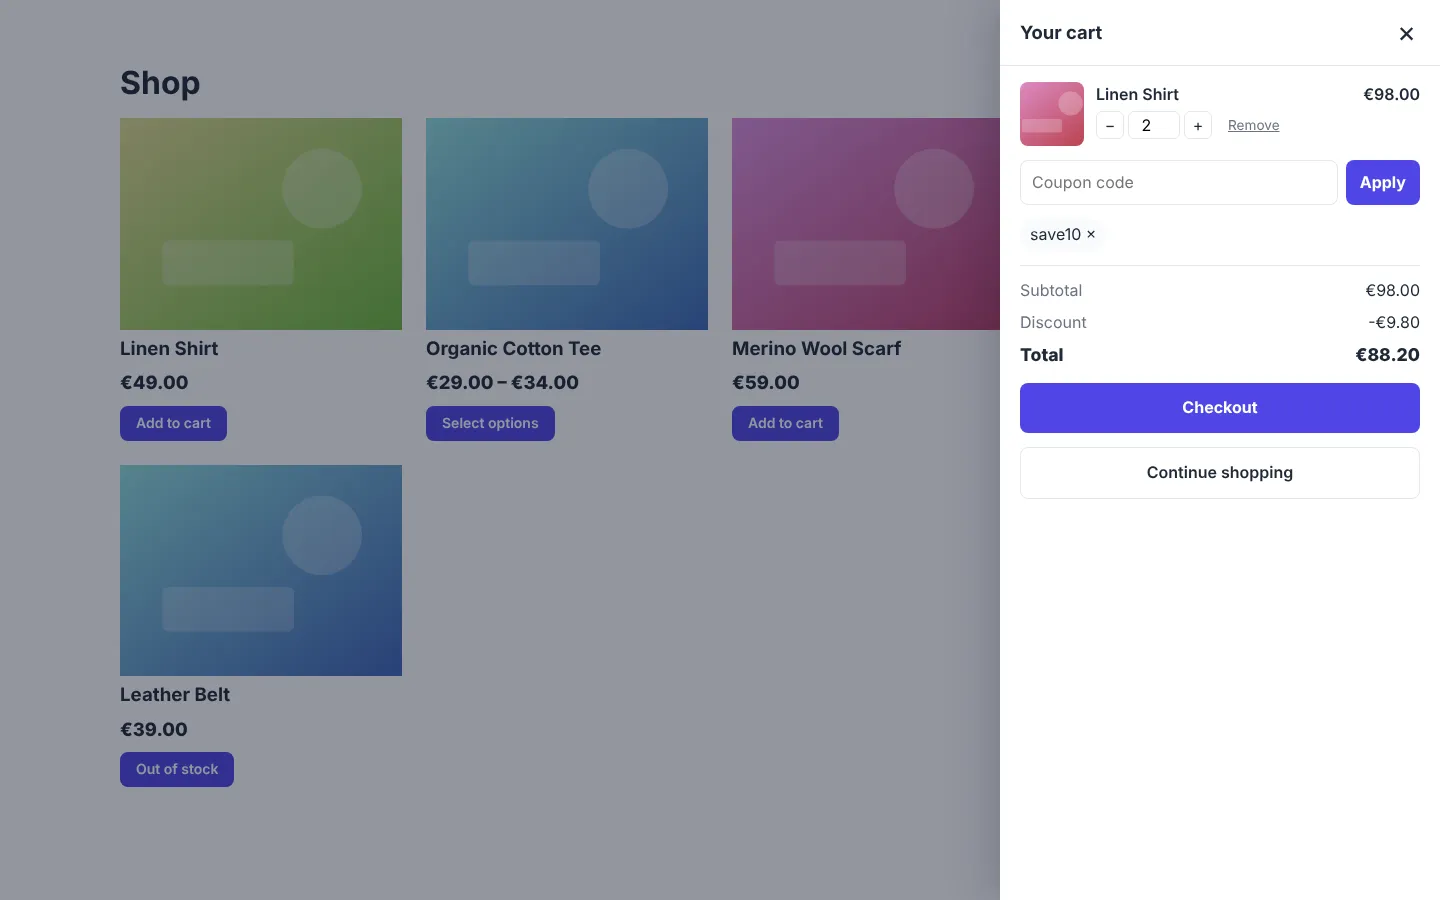
Connect a site with WooCommerce or Sidcraft Commerce and Canvasly also adds a Product template and a Shop page with product categories and tags. Bind units to price, sale badge, stock, SKU, brand, rating, gallery and the add-to-cart link. Prices show in the store's currency, sale prices with the old price struck out, and variable products as a price range.
The cart on your website: quantities, coupons and totals.
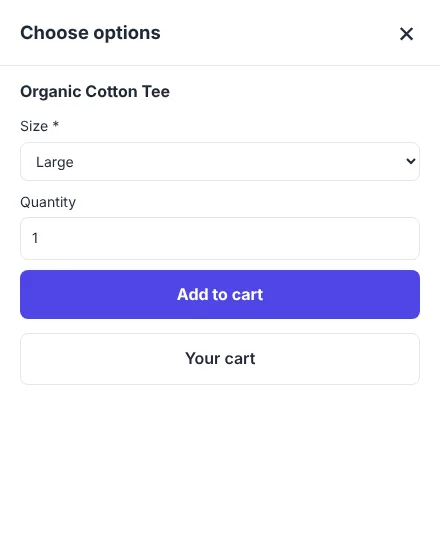
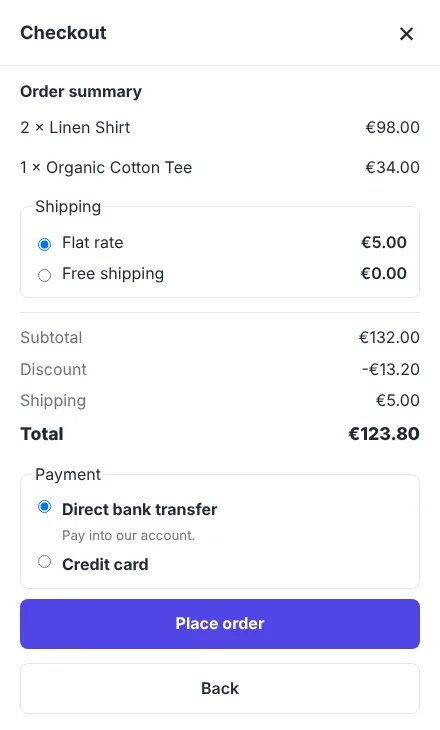
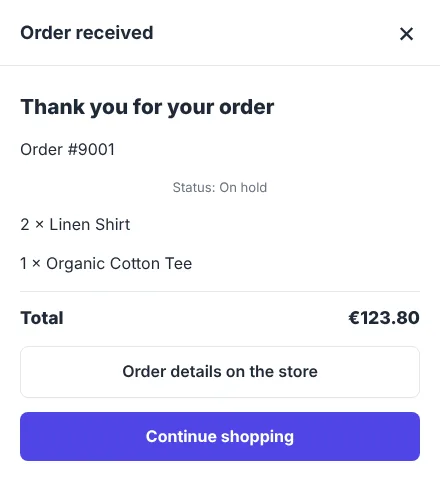
Sizes, variations and extras are chosen on your website.Shipping, totals and the store's payment methods.The thank-you view, back on your website.
Add to cart without leaving the page; products with sizes or options show an options form first (WooCommerce variations, Sidcraft Commerce option groups with their extra prices and text).
Checkout on your website: email and address, shipping choices, coupons and the final total, worked out by the store with its own taxes, shipping zones and stock.
Bank transfer, cheque, cash on delivery and PayPal-style payments are placed from your website, and the shopper comes back to a thank-you view with the order number. Card payments continue on the store's secure checkout with the same cart and address, so card details never pass through your site.
With Next.js, the website talks to the store through its own address: the shopper's browser never calls WordPress, and the cart's key is kept in a cookie scripts cannot read.
To place the cart in your design, link a button to #cart; an element with data-canvasly-cart-count shows the number of items. Otherwise a round cart button appears once something is in the cart.
Fast and safe by design
Post content is cleaned when pages are built: scripts, inline event handlers and unknown embeds are removed (YouTube, Vimeo and other known providers stay), links to WordPress point to your website, and images load lazily.
Refresh requests and preview links are signed with secrets kept only in your host and in WordPress, and checked in constant time; preview links expire after an hour.
Astro builds fetch your content 100 entries at a time; Next.js builds the newest entries ahead and older ones on their first visit.
Step-by-step, with screenshots, for non-technical users: read the steps above or the Help in Canvasly (F1 → Export → Headless WordPress).
Questions
Do my editors have to learn anything new?
No. They keep writing posts and pages in the WordPress admin. Canvasly only designs and exports the website visitors see; WordPress stays the editor.
Next.js or Astro: which should I choose?
Next.js updates only the changed pages the moment you publish, shows drafts in your design with Preview, and publishes to Vercel straight from Canvasly. Astro is a fully static site that any host can serve and is rebuilt by a deploy hook when content changes. If you are not sure, choose Next.js.
Is the Canvasly Headless Connector plugin required?
No, but it is recommended. Without it, pages refresh on a schedule (for example every 10 minutes). With it, pages refresh when you publish, drafts can be previewed on the front end, links point to the new site, and shops get the full cart and checkout.
Can I sell products?
Yes. Connect WooCommerce or Sidcraft Commerce and Canvasly adds a Product template and a Shop page. Shoppers add to cart, choose sizes and options, apply coupons, choose shipping and place the order on your site. Bank transfer, cash on delivery and PayPal-style payments finish there; card payments continue on the store's secure checkout with the same cart.
Where are my secrets stored?
Only in your host's environment variables and in the plugin's settings in WordPress. Canvasly never writes a secret into the exported code.
What happens to my WordPress theme?
Visitors no longer see it. The plugin can keep WordPress's own pages out of search engines or send visitors to the new site, while logged-in editors keep using WordPress as before.
Mark any unit with Advanced → Client can edit and install Canvasly Client Mode in WordPress. The export adds public/canvasly/cvcm-loader.js (only when something is editable and the WordPress address is https). It does nothing for visitors: an editor who opens Edit on the page in WordPress lands on your Next.js or Astro site with a signed link that lasts two hours, edits in place, and the Headless Connector refreshes the page. Needs your Canvasly Web Studio licence key, like every Client Mode site.