
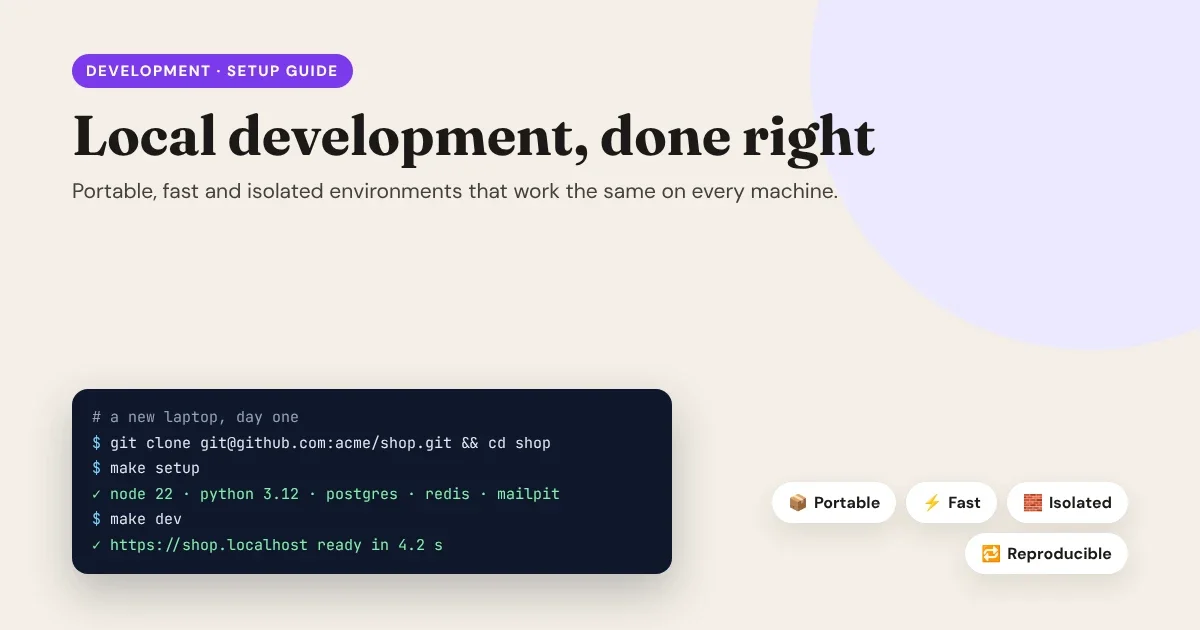
"It works on my machine" is the most expensive sentence in software. It means a bug that only shows up for one person, a new developer who loses their first week to setup, or a release that breaks because production runs a different version than your laptop. A good local development environment fixes all three. It's portable (it runs the same on every machine), fast (it doesn't slow you down), and isolated (projects don't interfere with each other or with your computer). Here's how to build one.
If setting up a project takes more than one command, it’s not documented, it’s folklore.
- Portable: the same result on every machine.
- Fast: it never slows you down.
- Isolated: projects can’t break each other, or your computer.
The goal
The five layers of a local setup
Every project's local environment is made of the same five layers. The secret of a portable setup is simple: write each layer down in the repository, so a new machine can rebuild it with one command.
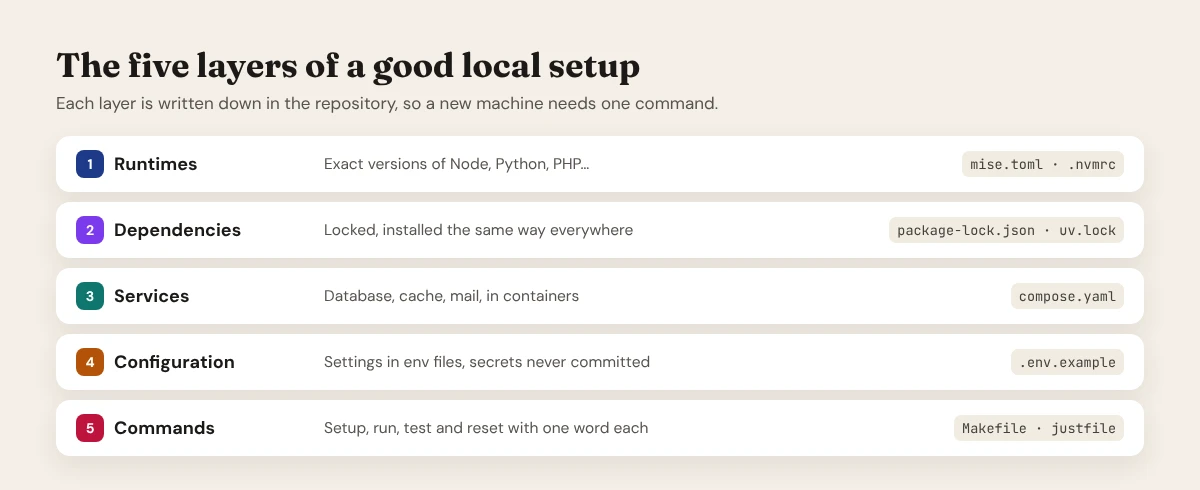
Let's go through them one by one.
1. Pin your runtime versions
Different projects need different versions of Node.js, Python, PHP or Ruby. Installing one global version for everything guarantees conflicts sooner or later.
Use a version manager that reads the version from a file in the project, and switches automatically when you enter the folder:
- mise (or asdf) handles many languages with one tool and one file.
- nvm or fnm for Node.js, pyenv or uv for Python, if you prefer one tool per language.
# mise.toml (in the project root)
[tools]
node = "22"
python = "3.12"
mise install # installs exactly these versions
node --version # v22.x inside this folder, whatever the rest of the machine usesCommit the version file (mise.toml, .tool-versions or .nvmrc), and make your CI use the same file. Local and CI now run the same runtime.
2. Lock your dependencies
Version ranges such as ^4.2 mean two developers can install two different versions on the same day. Commit the lockfile and install from it:
| Ecosystem | Lockfile | Install exactly what's locked |
|---|---|---|
| npm | package-lock.json |
npm ci |
| pnpm | pnpm-lock.yaml |
pnpm install --frozen-lockfile |
| Python (uv) | uv.lock |
uv sync --frozen |
| PHP (Composer) | composer.lock |
composer install |
Use the "frozen" install in CI and in your setup script. Only update the lockfile on purpose, in its own commit.
3. Run services in containers
Databases, caches and mail servers are where machines differ most, and where "just install it with Homebrew" leads to three projects fighting over one PostgreSQL. Run them in Docker Compose instead: one file, exact versions, and nothing installed on your computer.
# compose.yaml
services:
  db:
    image: postgres:16
    environment:
      POSTGRES_USER: app
      POSTGRES_PASSWORD: app
      POSTGRES_DB: app
    ports:
      - "127.0.0.1:5432:5432"   # only reachable from this machine
    volumes:
      - db-data:/var/lib/postgresql/data
    healthcheck:
      test: ["CMD-SHELL", "pg_isready -U app"]
      interval: 2s
      retries: 15

  redis:
    image: redis:7
    ports:
      - "127.0.0.1:6379:6379"

  mail:
    image: axllent/mailpit       # catches every email your app sends
    ports:
      - "127.0.0.1:8025:8025"    # web inbox
      - "127.0.0.1:1025:1025"    # SMTP for your app

volumes:
  db-data:
docker compose up -d --wait # start everything, wait until the database is healthy
docker compose down # stop (data stays in the volume)
docker compose down -v # stop and wipe the data: a clean slateA few habits make containers safer and easier:
- Pin image versions (
postgres:16, notpostgres:latest), and match what production runs. - Bind ports to
127.0.0.1, so your development database isn't reachable from the coffee-shop Wi-Fi. - Use a mail catcher such as Mailpit, so test emails never reach real people.
- Give each project its own Compose project, which happens automatically per folder, so data never mixes.
Should the app itself run in a container?
Not always. Running the services in containers and the app directly on your machine is often the fastest combination, especially on macOS, where file sharing between the host and containers is slower. Run the app in a container too when you need an exact match with production's operating system, or when the tooling is hard to install natively.
4. Want full isolation? Use a Dev Container
A Dev Container puts the whole development environment (runtimes, tools, editor extensions and services) inside containers, described by one file. VS Code, Cursor, JetBrains IDEs and GitHub Codespaces can all open it.
// .devcontainer/devcontainer.json
{
  "name": "shop",
  "image": "mcr.microsoft.com/devcontainers/javascript-node:22",
  "forwardPorts": [3000],
  "postCreateCommand": "npm ci",
  "customizations": {
    "vscode": { "extensions": ["dbaeumer.vscode-eslint", "esbenp.prettier-vscode"] }
  }
}
Open the folder, choose Reopen in Container, and a new team member has a working environment without installing anything but Docker and an editor. The same file runs in the cloud with Codespaces, which is handy for reviews and for working from a tablet.
Install Docker and an editor, open the folder, and start working. Everything else is described in the repository.
The Dev Container promise
5. Handle configuration and secrets safely
Settings that change between machines (database address, API keys, feature flags) belong in environment variables, not in the code.
- Commit a
.env.examplewith every variable the app needs and safe placeholder values. - Keep the real
.envout of Git (add it to.gitignore), and create it from the example during setup. - Use test keys locally. Stripe, PayPal and most other services offer sandbox keys; never put production keys on a laptop.
- Share secrets with a password manager or secrets tool, not in chat or email. Tools like 1Password CLI, Doppler or Infisical can fill your
.envfor you. - direnv can load the right variables automatically when you enter the project folder.
# .env.example (committed)
DATABASE_URL=postgres://app:app@127.0.0.1:5432/app
REDIS_URL=redis://127.0.0.1:6379
SMTP_HOST=127.0.0.1
SMTP_PORT=1025
STRIPE_SECRET_KEY=sk_test_replace_me
6. Local domains and HTTPS
Many things behave differently on http://localhost:3000 than in production: secure cookies, OAuth redirects, service workers, mixed-content rules. A local domain with HTTPS removes the surprises.
- *Use `.localhost
** (for exampleshop.localhost): modern browsers send it to your own machine automatically. **.test`** is also reserved for this purpose, but needs a hosts-file entry or a local DNS tool. - Avoid
.dev: it's a real top-level domain, and browsers force HTTPS on it. Avoid.localtoo: it's used for network discovery, and can cause slow lookups, especially on macOS. - Create trusted certificates with mkcert, so the browser shows a padlock instead of a warning:
mkcert -install                 # once per machine: trust the local certificate authority
mkcert shop.localhost           # creates shop.localhost.pem and shop.localhost-key.pem
Point your dev server or a local proxy (Caddy, Traefik, nginx) at those files.
7. One command for everything
The best documentation is a command that works. Put the common tasks behind short, memorable names, with a Makefile, a justfile or package.json scripts:
# Makefile
setup:            ## first run on a new machine
    mise install
    cp -n .env.example .env || true
    npm ci
    docker compose up -d --wait
    npm run db:migrate && npm run db:seed

dev:              ## start everything
    docker compose up -d --wait
    npm run dev

test:             ## same checks as CI
    npm run lint && npm test

reset:            ## back to a clean database
    docker compose down -v
    docker compose up -d --wait
    npm run db:migrate && npm run db:seed
Now the README can be four lines long: clone, make setup, make dev, open the URL.
Realistic data, without real people
Seed scripts and fixtures give everyone the same starting data. If you need production-like volumes, use an anonymised snapshot: replace names, emails, addresses and payment details before the data leaves production. Never copy real customer data to a laptop.
Make it fast
A portable setup is only useful if people enjoy using it:
- Windows: use WSL 2, and keep the code inside the Linux filesystem (your home folder in WSL), not under
/mnt/c. File access is dramatically faster there. - macOS: enable the fastest file sharing in Docker Desktop (VirtioFS), or try a lighter engine such as OrbStack. Keep heavy folders like
node_modulesout of shared bind mounts, in a named volume or on the host. - Cache dependencies between runs: package-manager caches, Docker layer caching, and
npm ciin a cached layer. - Use hot reload. Modern tools (Vite, Next.js, Astro, Django, Laravel) reload in milliseconds when you save.
- Start only what you need. Compose profiles let you leave rarely used services off by default.
Keep it consistent
.editorconfigkeeps indentation and line endings the same in every editor.- Formatters and linters on commit (pre-commit hooks with tools like Husky, Lefthook or pre-commit) stop style debates and simple mistakes.
- CI runs the same commands as
make test, with the same versions file. If it passes locally, it passes in CI. - Document the exceptions. If something can't be automated, write it in the README, briefly.
Your local environment should be the most boring part of your day: same versions, same commands, same results, everywhere.
Consistency wins
AI assistants in your local environment
AI coding assistants work best with a local setup they can understand: clear commands, a seeded database and tests they can run. Keep them safe:
- Let them run
make test, not commands against production. - Give them test keys, never real secrets.
- Prefer tools that connect through local-only MCP servers with a token, so nothing on the internet can drive them.
Where Canvasly Web Studio fits
Canvasly Web Studio follows the same principles for the design side of a project:
- It runs locally. The desktop app starts its studio on your own machine (on
127.0.0.1), and your projects are ordinary folders in Documents › Canvasly Projects, easy to back up or put in Git. - Its MCP server is local-only and needs a token, so AI apps such as Claude Code and Cursor can build pages in Canvasly on your machine, and only there.
- Exports drop straight into a local workflow. A Next.js or Astro export is a normal project:
npm install,npm run dev, and you're editing it in your own editor. - Local headless WordPress works too. Run WordPress and MariaDB with Docker Compose (the official
wordpressandmariadbimages), connect Canvasly's desktop app to your local WordPress address, design the templates, and export a Next.js or Astro front end that runs next to it. The desktop app accepts local addresses for exactly this purpose. See How to set up headless WordPress with Next.js or Astro.
The new-laptop test
The best way to check your setup is to try it fresh, on a new machine, a new user account, or a Codespace:
- Can you go from
git cloneto a running app with one or two commands? - Does it take under ten minutes, without asking anyone for help?
- Are runtime versions, dependencies and services all pinned in the repository?
- Is there a
.env.example, and are no secrets committed? - Can you reset to a clean database in one command?
- Do tests run the same way locally and in CI?
- Are ports bound to
127.0.0.1and test emails caught locally?
If you can answer "yes" to all seven, you've built a local environment your team will thank you for.
Conclusion
A great local environment isn't about one perfect tool. It's about writing every layer down: pinned runtimes, locked dependencies, services in containers, safe configuration, and one command to run it all. Do that, and "it works on my machine" becomes "it works on every machine", including the one that runs production.
Designing the website part of your project? Try Canvasly Web Studio free for 7 days at canvasly.pro.
Related reading: Database performance tuning 101 · Minimalist web stack vs. heavy page builders