
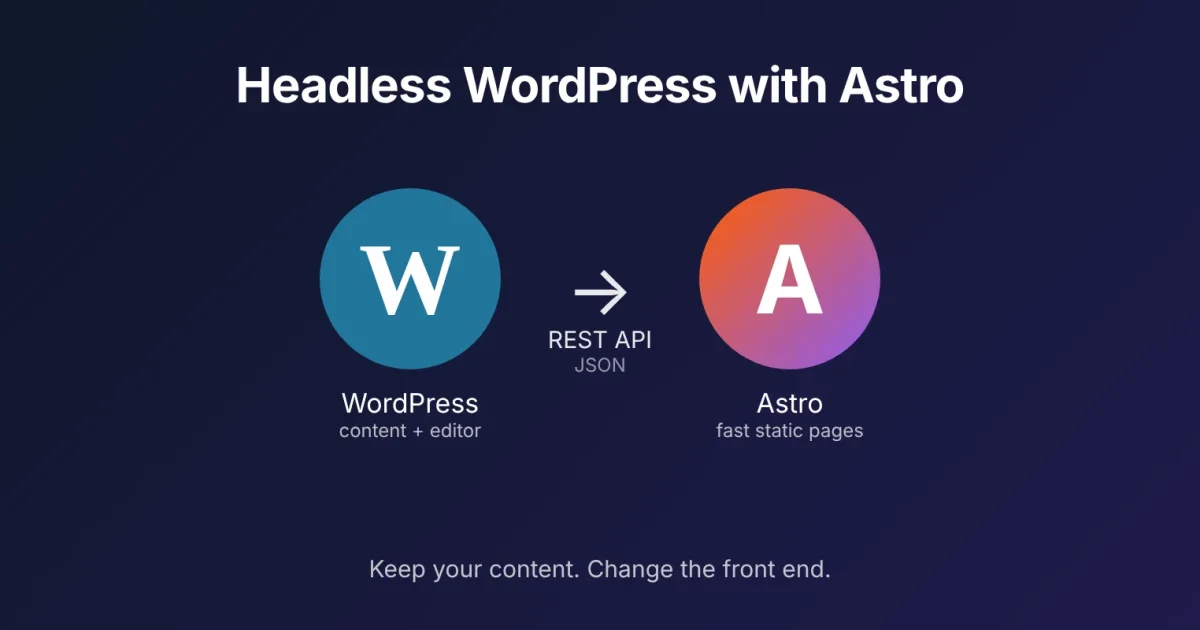
You can keep writing in WordPress and still get a fast, static front end. In a headless setup WordPress stays as your editor and database, and Astro builds the pages visitors see. Your content, users and plugins stay where they are. Only the front end changes.
The short version
- Move WordPress to a private address such as
cms.example.com. Leave it running as it is. - Create an Astro project that reads your content from the WordPress REST API.
- Build static pages from that content, upload them to
example.com, and rebuild whenever you publish.
WordPress already has a REST API built in, so you don't need to install anything to start. This guide walks through each step with working code.
Is headless the right choice?
It is a good fit when:
- your site is mostly pages and posts (a blog, a company site, documentation),
- you want much faster pages and less to attack than a public WordPress,
- your editors like WordPress and you don't want to retrain them.
It is a poor fit when your visitors need server features on every page: a shop, memberships, comments, live search or logged-in content. If you sell online, keep the shop in WordPress with Sidcraft Commerce (or WooCommerce) and serve only the pages around it from Astro. Step 8 below shows how.
Also, headless is not free. You now run two things instead of one, and some plugin features (forms, page builders, shortcodes) don't carry over by themselves. Read the checklist near the end before you start.
Step 1: Give WordPress its own address
Today WordPress lives at example.com. Astro will take that address, so WordPress needs a new home:
- Create a subdomain such as
cms.example.comand point it at the same hosting. - In Settings → General, change both the WordPress Address and the Site Address to
https://cms.example.com. - Check that
https://cms.example.com/wp-adminstill works.
Do this on a staging copy first if you can. Changing these addresses affects every link inside your content, and you want to see that on a test site before the live one.
Then keep the CMS out of search results, or Google will index both sites as duplicates:
- In Settings → Reading, tick Discourage search engines from indexing this site.
- Better still, add this header for the whole
cmshost in your web server and put the admin behind a login or an IP allowlist:
X-Robots-Tag: noindex, nofollowStep 2: Test the REST API
Open this address in your browser:
https://cms.example.com/wp-json/wp/v2/posts?per_page=2You should see JSON with your latest posts. The useful endpoints are:
| What | Address |
|---|---|
| Posts | /wp-json/wp/v2/posts |
| Pages | /wp-json/wp/v2/pages |
| Categories | /wp-json/wp/v2/categories |
| Tags | /wp-json/wp/v2/tags |
| Media | /wp-json/wp/v2/media |
| Authors | /wp-json/wp/v2/users |
Two options save a lot of work:
?_embedadds the featured image, author and categories to each post in one request.?per_page=100&page=2pages through large sites. TheX-WP-TotalPagesresponse header tells you how many pages there are.
If the address returns an error, a security plugin or your host may be blocking the REST API. Allow it for read-only requests before you go on.
Custom post types and custom fields. A custom post type appears in the API only when it was registered with show_in_rest set to true. ACF fields need the ACF REST option turned on. Check the endpoint in your browser before you build anything on it.
Step 3: Create the Astro project
On your computer (or your server), with Node.js installed:
npm create astro@latest my-site
cd my-site
npm run dev
Choose the Empty template when asked. Then store the WordPress address in an environment file instead of in your code. Create .env in the project folder:
WP_URL=https://cms.example.comDon't commit .env to Git, and never put passwords or tokens in your source files. Everything in this guide works without any login, because published posts and pages are public.
Step 4: A small helper that fetches content
Create src/lib/wp.js. It reads every page of results, so a site with more than 100 posts still works:
const BASE = import.meta.env.WP_URL;

async function getAll(path) {
  const items = [];
  let page = 1;
  let totalPages = 1;

  do {
    const sep = path.includes('?') ? '&' : '?';
    const res = await fetch(`${BASE}/wp-json/wp/v2/${path}${sep}per_page=100&page=${page}&_embed`);
    if (!res.ok) throw new Error(`WordPress answered ${res.status} for ${path}`);
    totalPages = Number(res.headers.get('X-WP-TotalPages') || 1);
    items.push(...(await res.json()));
    page += 1;
  } while (page <= totalPages);

  return items;
}

export const getPosts = () => getAll('posts');
export const getPages = () => getAll('pages');
Step 5: Build the blog routes
Create src/pages/blog/[slug].astro. Astro calls getStaticPaths at build time and makes one HTML file per post:
---
import { getPosts } from '../../lib/wp.js';

export async function getStaticPaths() {
  const posts = await getPosts();
  return posts.map((post) => ({
    params: { slug: post.slug },
    props: { post },
  }));
}

const { post } = Astro.props;
const image = post._embedded?.['wp:featuredmedia']?.[0];
---
<html lang="en">
  <head>
    <meta charset="utf-8" />
    <meta name="viewport" content="width=device-width, initial-scale=1" />
    <title set:html={post.title.rendered} />
    <meta name="description" content={post.excerpt.rendered.replace(/<[^>]+>/g, '').trim()} />
  </head>
  <body>
    <article>
      <h1 set:html={post.title.rendered} />
      {image && <img src={image.source_url} alt={image.alt_text} />}
      <div set:html={post.content.rendered} />
    </article>
  </body>
</html>
Add a list page at src/pages/blog/index.astro:
---
import { getPosts } from '../../lib/wp.js';
const posts = await getPosts();
---
<h1>Blog</h1>
<ul>
  {posts.map((post) => (
    <li><a href={`/blog/${post.slug}/`} set:html={post.title.rendered} /></li>
  ))}
</ul>
Run npm run dev and open http://localhost:4321/blog/. Your WordPress posts should appear.
Pages work the same way. Copy the route to src/pages/[slug].astro and use getPages(). Make the home page by hand in src/pages/index.astro, or fetch the WordPress page marked as your front page.
Step 6: Keep the same addresses
Search engines already know your page addresses, so keep them. If your WordPress permalinks are /blog/post-name/, build Astro's routes to match. For any address that has to change, add a permanent (301) redirect on your server or in astro.config.mjs:
import { defineConfig } from 'astro/config';

export default defineConfig({
  output: 'static',
  trailingSlash: 'always',
  redirects: {
    '/old-address/': '/new-address/',
  },
});
Compare your list of live addresses with the Astro build before you switch. Every address that worked before should still work after.
Step 7: SEO, images and the details
SEO plugins. If you use Yoast or Rank Math, the title, description and social image are in the API response (look for yoast_head_json on each post). Read those fields into your <head> instead of rebuilding them. If you use neither, write the title and description in your template as above.
Images. WordPress content contains full image addresses that point at cms.example.com. That works, but it ties your fast site to your slower CMS. Two better options:
- Download the images at build time and save them in
public/, then replace the addresses in the HTML. - Keep them on the CMS host but put a CDN in front of it.
Also check that every image has an alt text and a width and height, so pages don't jump while loading.
Menus. WordPress doesn't give classic menus to the REST API by default. Build the navigation by hand in an Astro layout (for most sites it changes a few times a year), or use a menu plugin that exposes one.
Sitemap. Add the official sitemap integration with npx astro add sitemap, set site: 'https://example.com' in astro.config.mjs, and submit the result in Google Search Console.
Block content. The content.rendered field is ready-made HTML from the block editor. Core blocks look right once your CSS styles .wp-block-* classes, but a page builder's output may need its own stylesheet, or may not render at all. Test your most complex pages first.
Step 8: What WordPress still has to do
Static pages cannot run server code. Decide each of these before the switch:
| Feature | What to do |
|---|---|
| Contact forms | Use a form service or a small endpoint. Or embed a form that posts to WordPress. |
| Comments | Use a comment service, or switch comments off. |
| Search | Use a client-side search such as Pagefind, built at the same time as the site. |
| Shop and checkout | Leave on WordPress, for example with Sidcraft Commerce or WooCommerce, at a path such as shop.example.com, and link to it from Astro. |
| Memberships | Keep that part on WordPress. |
Step 9: Rebuild when you publish
A static site only changes when you build it again. You don't want to press a button every time you fix a typo, so let WordPress start the build for you. The tool for that is a build hook.
What is a build hook?
A build hook is a private web address that works like a doorbell. When something visits it, your host starts a new build of your Astro site. It looks like this:
https://api.netlify.com/build_hooks/5f8a1b2c3d4e5f6a7b8c9d0eVisiting it does nothing else: no page appears, it just rings the bell. You then ask WordPress to ring that bell every time you publish. The chain is:
- You click Publish in WordPress.
- WordPress calls the build hook address.
- Your host rebuilds the Astro site from the latest WordPress content.
- About a minute later the new page is live.
Example with Netlify (about 5 minutes)
You can do the same on Vercel (Settings → Git → Deploy Hooks) and Cloudflare Pages (Settings → Builds → Deploy hooks). The names differ slightly, but the idea is the same.
A. Create the hook
- Log in to Netlify and open your site.
- Go to Site configuration → Build & deploy → Build hooks.
- Click Add build hook, name it
WordPress publish, choose your main branch and click Save. - Copy the address it shows. This is your build hook. Treat it like a password: anyone who has it can start builds.
B. Test it before you connect WordPress
Paste the address into a terminal like this (the -X POST part matters), or use any "send a POST request" tool:
curl -X POST -d '{}' https://api.netlify.com/build_hooks/YOUR_HOOK_IDLook at the Deploys page in Netlify. A new build should appear within seconds. If it does, the hook works. If you'd rather not use a terminal, skip this test, and do it in step D instead by publishing a test post.
C. Tell WordPress the address
Open wp-config.php in your WordPress folder (your host's file manager or FTP can do this) and add this line above the text That's all, stop editing!:
define( 'SITE_BUILD_HOOK_URL', 'https://api.netlify.com/build_hooks/YOUR_HOOK_ID' );Keeping the address here, and not inside a plugin or theme, means it stays out of your content and out of any Git repository.
D. Make WordPress ring it when you publish
Add this small plugin. Create a file called rebuild-on-publish.php and upload it to wp-content/plugins/ (or paste the code into a code-snippets plugin), then activate it under Plugins:
<?php
/**
 * Plugin Name: Rebuild site on publish
 * Description: Starts a new build of the static front end when content is published, updated or unpublished.
 */

add_action( 'transition_post_status', function ( $new_status, $old_status, $post ) {

    // Only react when a post or page goes live, changes while live, or goes offline.
    if ( 'publish' !== $new_status && 'publish' !== $old_status ) {
        return;
    }

    // Ignore revisions and menu items.
    if ( wp_is_post_revision( $post ) || 'nav_menu_item' === $post->post_type ) {
        return;
    }

    if ( ! defined( 'SITE_BUILD_HOOK_URL' ) ) {
        return;
    }

    // Ring the bell at most once a minute, so several quick saves make one build.
    if ( get_transient( 'rebuild_hook_sent' ) ) {
        return;
    }
    set_transient( 'rebuild_hook_sent', 1, MINUTE_IN_SECONDS );

    wp_remote_post( SITE_BUILD_HOOK_URL, array(
        'blocking' => false,
        'body'     => '{}',
        'timeout'  => 5,
    ) );
}, 10, 3 );
What it does, in plain words: when any post or page is published, updated or taken offline, it rings the bell. If you save five times in a minute it rings once, so you don't pay for five builds. 'blocking' => false means WordPress doesn't wait for the answer, so Publish stays fast.
If you would rather not edit any files, a webhook plugin such as WP Webhooks does the same job: choose the trigger Post published/updated and paste your build hook address as the receiving URL.
E. Try it
- In WordPress, change one word in a post and click Update.
- Open the Deploys page in Netlify. A new build starts within seconds.
- When it shows Published (usually 1 to 2 minutes), reload the page on your live site. The change is there.
If nothing happens, check that the define line has the full address with no spaces, that the plugin is active, and run the test in step B again.
Rebuilding on your own server
If you host Astro on your own server, the doorbell idea is the same, but the server has to run the build itself. Ask your developer or host to set up a small script that runs npm run build and copies the dist folder into the web root, and a private address that starts it. Run that script as the site's own user, not as root, so the files keep the right owner.
Two safety rules for any build hook:
- Keep the address private. Don't paste it into a public page, a chat or a Git repository.
- If it leaks, delete the hook in your host's settings and create a new one, then update the line in
wp-config.php.
Step 10: Deploy
Build the site:
npm run buildThe dist folder holds plain HTML, CSS and images. Upload it to any host, or let Netlify, Vercel or Cloudflare Pages build from your Git repository. Then:
- Point
example.comat the Astro host. - Check the CMS is still at
cms.example.com, with search indexing blocked. - Open your old addresses, test the redirects and submit the new sitemap in Search Console.
- Keep a backup of the old WordPress setup for a few weeks.
Checklist before you switch
- WordPress runs on its own address and is blocked from search engines.
- The REST API returns posts, pages and any custom post types you use.
- Every old address works, or redirects permanently to the new one.
- Titles, descriptions and social images are filled in on every page.
- Forms, search and comments each have a replacement.
- Publishing in WordPress triggers a rebuild, and you've tested it.
- The new sitemap is submitted, and the old site is backed up.
A simpler route for pages-only sites
If your site is mostly pages and you don't need WordPress to keep supplying content, you can skip the API and the two-system setup completely. In Canvasly Web Studio, click Import → From URL, edit the page on the canvas and export it as static HTML or as an Astro project, with no code to maintain. Choose headless when you want editors to keep working in WordPress. Choose the static export when you are ready to leave it.
Related reading: Migrate WordPress to Static HTML: No Code, No Scripts · Headless CMS vs. monolithic CMS · Migrate WordPress to Astro or Next.js with AI