
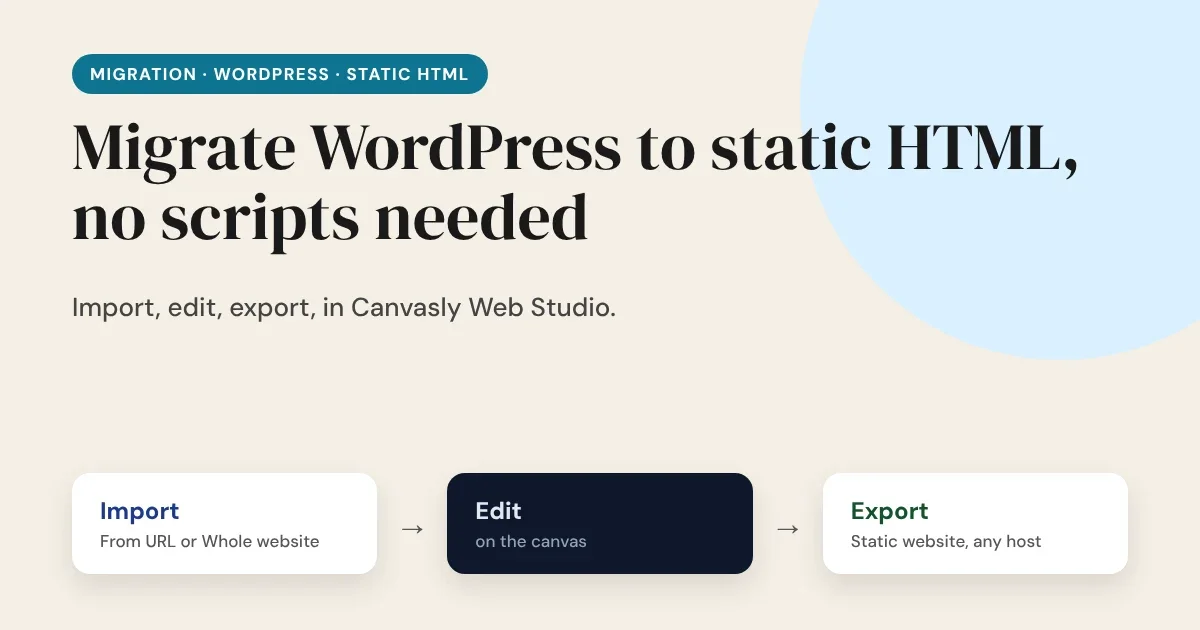
Most guides to leaving WordPress tell you to learn a static site generator, write a conversion script and then maintain it. You can skip all of that. In Canvasly Web Studio, migrating a page takes three steps: Import, edit, export. No scripts, no command line and nothing to keep updated afterwards.
The short version
- Click Import in the top bar and choose From URL.
- Paste the page address, leave the method on Convert markup to units, and click Import.
- Check the page on the canvas, then choose Export → Static website and upload the result to any host.
That's the whole job for a page. The rest of this guide covers a whole site, what you should check, and what a static site cannot do.
Step 1: Import a page from its address
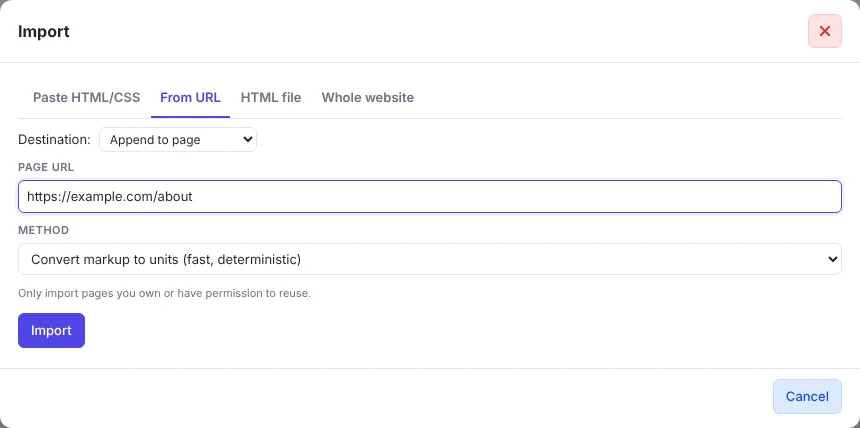
Open the project, click Import in the top bar, and open the From URL tab.
- Destination: Append to page, Replace page content or Create a new page. For a migration, use Create a new page for each page you bring in.
- Page URL: the address of the WordPress page.
- Method: Convert markup to units is fast and gives the same result every time. AI rebuild with native Pro units is the other choice; it uses your own AI key.
Click Import. The page arrives as editable units: headings, text, images, buttons and sections you can select, move and restyle on the canvas.
Step 2: Import the whole site
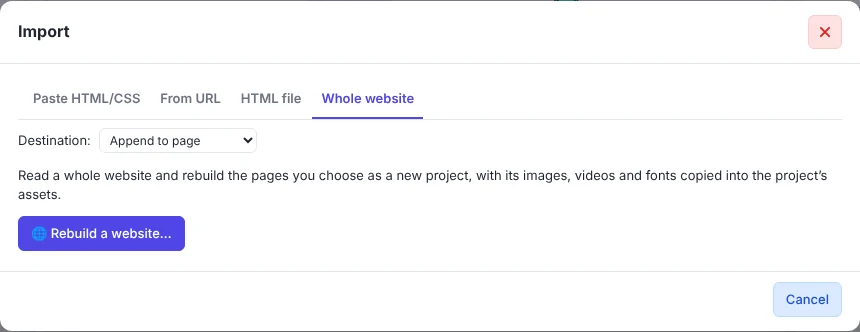
To bring over many pages at once, use the Whole website tab and click Rebuild a website:
- Enter the site's address and confirm that you own it or have permission to copy it.
- Choose how to handle the header and footer. Using the first page's as the site header and footer is the recommended choice, so you edit them once for every page.
- Leave Copy media on. Images, fonts and backgrounds are downloaded into the project, so the new site no longer depends on the old server.
- Click Read website. Canvasly finds the pages from the site's links and sitemap (it respects
robots.txt). Tick the ones you want, up to 50 per import, and click Create project.
You get a new project with those pages, links between them already pointing at the new pages, and a log of anything it could not copy. The old site's scripts are listed, never copied, so you decide which ones to keep.
Step 3: Edit, then export as static HTML
Fix anything that needs fixing on the canvas: change text, swap a photo, adjust the layout, or fill in the SEO title and description of each page.
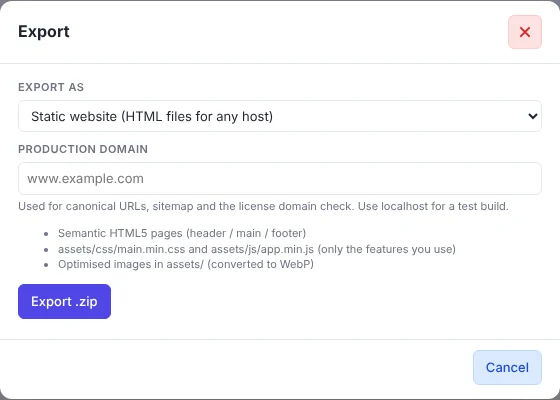
Then click Export, leave Export as on Static website, enter your site's domain and click Export .zip. The zip contains:
- clean, semantic HTML5 pages,
- one stylesheet and one small script with only the features your pages use,
- images converted to WebP,
sitemap.xml,robots.txtand structured data.
Upload the contents to any web host. You can also publish straight from Canvasly by FTP, SFTP, GitHub Pages, Netlify or Vercel. There is no database, no PHP and no plugin updates.
What to check before you switch
A static site is faster and simpler, but it is a rebuilt copy, not a magic clone. Go through this list on a test address first:
- Pages. Open each page on desktop and phone and compare it with the old one. Fix spacing and fonts on the canvas.
- Forms. WordPress form plugins run on the server. A static site needs a form endpoint or service. Set one in the project's form settings and send a test message.
- Shops, memberships and comments. These need server code. If you sell online, keep the shop on WordPress with Sidcraft Commerce (or WooCommerce) and use the static site for the pages around it. A site that only needs pages is the best fit for this route.
- Addresses and redirects. Keep the same page addresses where you can. If any address changes, add permanent (301) redirects on your host so search engines and visitors find the new page.
- Search titles and descriptions. Check each page's title, description and canonical address, and submit the new
sitemap.xmlin Google Search Console after the switch. - Keep the old site for a few weeks. Don't delete WordPress until the new site has been live and checked.
If the import answers 403
Some sites, especially those behind bot protection such as Cloudflare, refuse automated requests, and the import says the address "answered 403". Nothing is wrong with Canvasly. Open the page in your browser, view the page source (or save it with Ctrl+S as Webpage, HTML only), then use the Paste HTML/CSS or HTML file tab instead. If the site is yours, you can also allow the importer in your bot-protection settings.
Only import pages you own or have permission to reuse.
Why this beats a script
A conversion script is something you write, test, debug and then maintain every time a page or a tool changes. With Canvasly the same steps work for every page and every site, the result stays editable on the canvas, and the next change is a click, not a code change.
Try it: Download Canvasly Web Studio and use the free 7-day trial. Canvasly Web Studio runs on Windows.
Related reading: Migrate WordPress to Astro or Next.js with AI · Headless CMS vs. monolithic CMS · Export and publish