"I moved my WordPress site to Astro in a weekend with AI." You see a post like that on X every few days. Sometimes it is true. More often the weekend produced the home page, and the other 80 pages, the contact form, the redirects and the search rankings were still waiting on Monday.
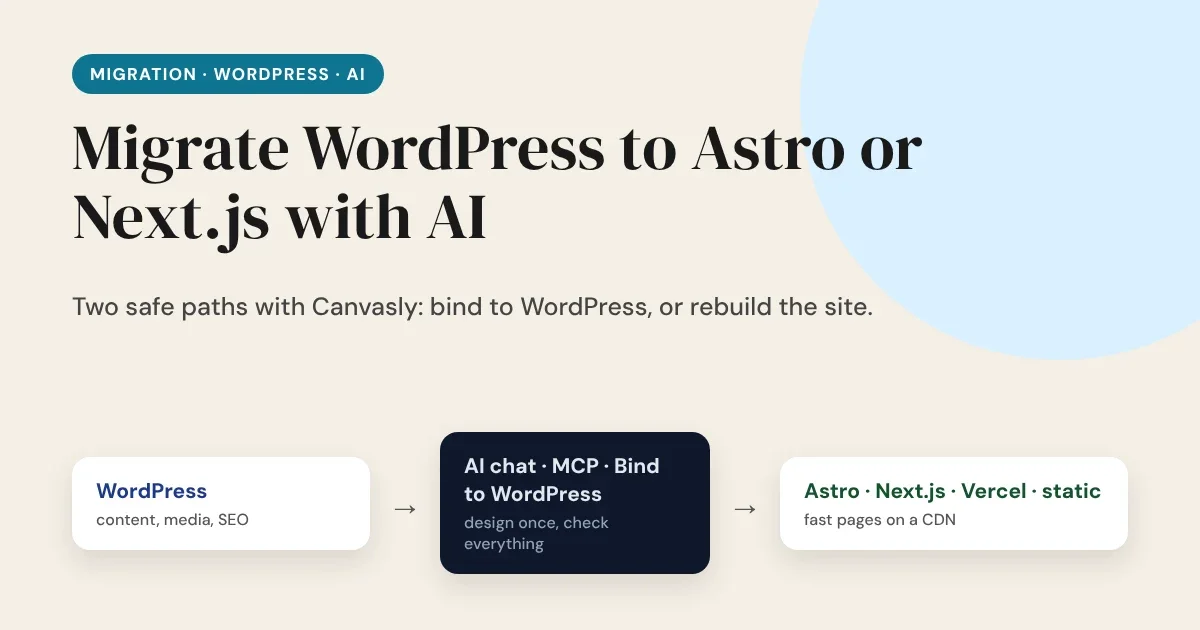
AI is genuinely useful for this job. It is not a magic button, and the posts that say so leave out the boring half. This guide shows how to migrate a WordPress site to Astro, Next.js, Vercel or plain static HTML using the Canvasly AI chat, the MCP server and Bind to WordPress, and where you still have to check the work yourself.
First decision: do you want to leave WordPress, or just its front end?
Most "WordPress migration" threads mix up two different goals.
Path A: keep WordPress as the editor, replace the front end. Your team keeps writing posts and pages in the WordPress admin. Visitors get a fast Astro or Next.js site built from the same content through the WordPress REST API. This is headless WordPress. It is the lower-risk path because your content, users, media and SEO plugins stay where they are.
Path B: leave WordPress completely. You rebuild the pages as a static site and host it anywhere. There is no database, no PHP and no plugin updates. It suits brochure sites that change a few times a year. It costs you the WordPress editor, so you need another way to change content later.
If you cannot decide, start with Path A. You can still move to Path B once the new front end is proven.
The three AI tools in Canvasly, and what each is good for
| Tool | What it does | Use it for |
|---|---|---|
| AI chat (the AI button in Canvasly Web Studio) | Edits the open page with real, editable units. You describe a change, it applies it, and the whole reply is one undo step. | Restyling, rewriting sections, adding a block, fixing a layout |
| MCP server | Lets Claude Code, Claude Desktop, Cursor and similar apps build in Canvasly: create pages, set colours and fonts, import HTML, rebuild a website, find photos. | Doing the repetitive migration work across many pages from your coding assistant |
| AI Site Planner | Turns a short conversation into a sitemap, wireframes with real copy and a site style. | Planning the new structure before you build it |
All three work on the same project, so you can mix them. The MCP server listens only on your own computer and needs a token. Code and delete actions are off by default.
Path A, step by step: bind to WordPress
1. Back up and make a staging copy. Before anything else, export your WordPress database and files. Keep the live site untouched until the end.
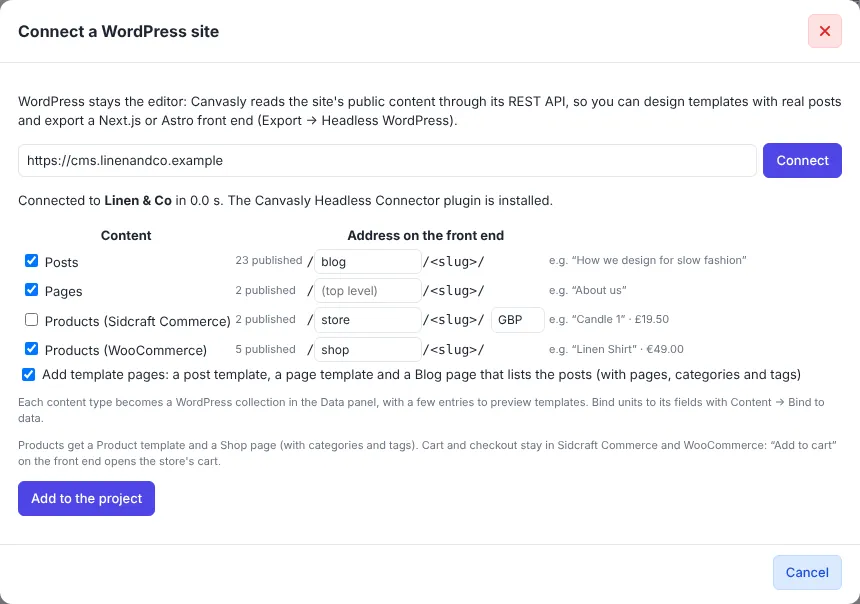
2. Connect the site. In Canvasly Web Studio choose File, Connect WordPress Site, and enter the address. Canvasly checks the site's REST API (/wp-json/) and lists the content types it finds, with a few entries each. Choose which types to bring over and what address each gets on the new front end, for example posts at /blog/<slug>/ and pages at /<slug>/.
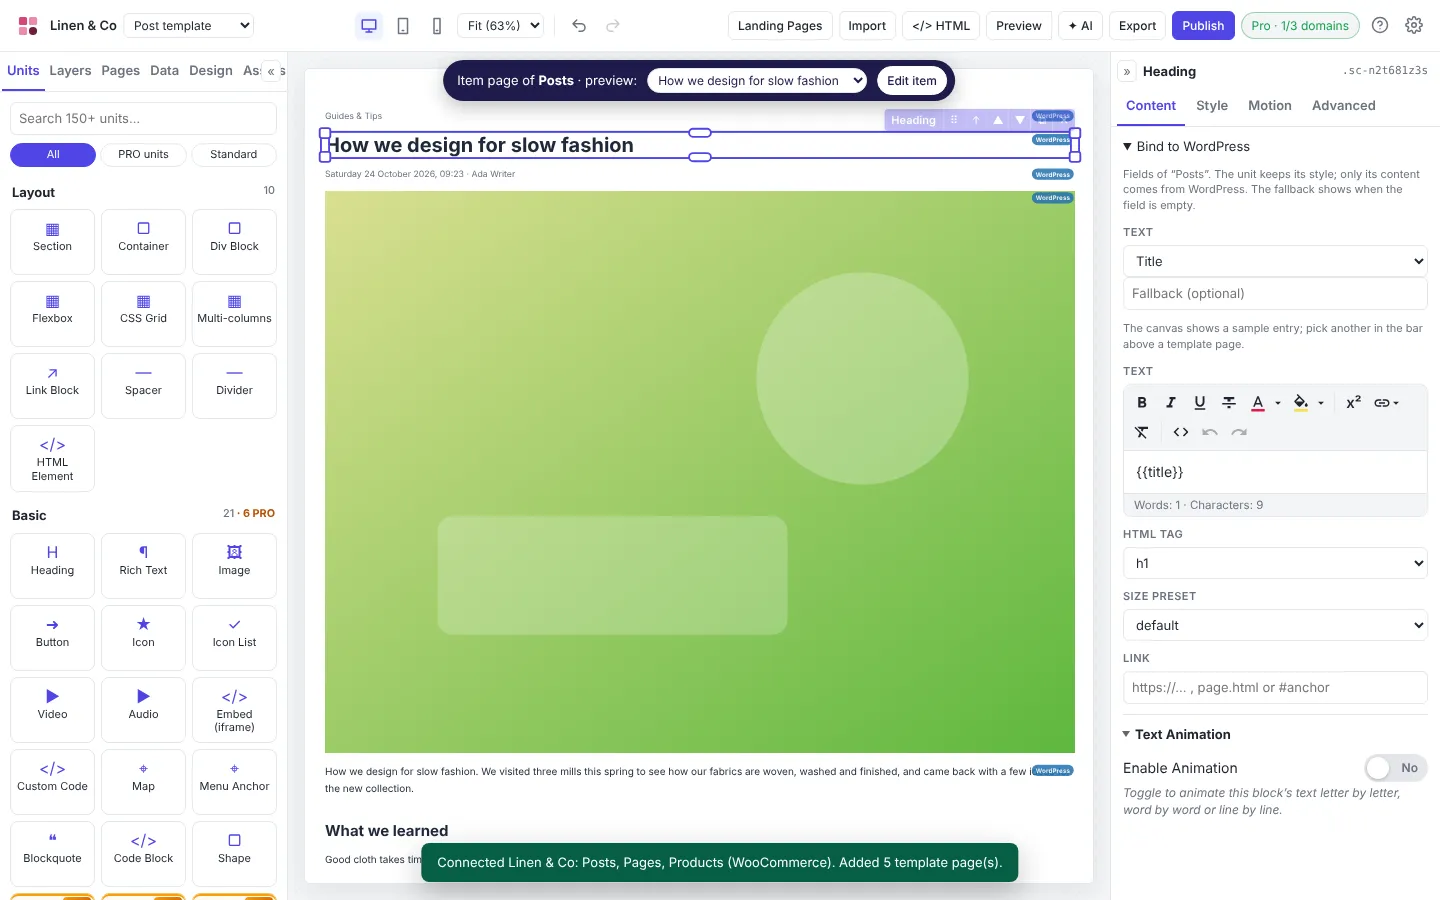
3. Let Canvasly create the templates. It adds a Post template, a Page template and a Blog page (a loop of your posts, which also serves as the category and tag page). They show real entries from your site, so you design with real content, not placeholders.
4. Design once, bind the content. Select a unit and open Content, Bind to WordPress. Choose a field: title, excerpt, content, featured image, date, author, category, permalink, Yoast or Rank Math SEO fields, or ACF fields. Add a fallback for when the field is empty. The unit keeps all its styling and shows a small WordPress badge. In any setting you can also type {{title}} or {{excerpt|No summary}}.
5. Use the AI chat for the design work. This is where AI saves real time. Ask it things like:
- "Add a three-column section of the latest posts under the hero."
- "Make the post template calmer: larger line height, narrower text column, author and date under the title."
- "Match the colours and fonts of the old site."
Anything it gets wrong is one Ctrl+Z away. If a reply contains an invalid change, nothing is applied.
6. Export. Choose Export, Headless WordPress, pick Next.js or Astro, enter the WordPress address and how often pages should refresh. Canvasly checks that the site can be reached first. If it cannot, the export stops with the reason instead of giving you a broken project. You can also publish straight to Vercel.
7. Install the Connector plugin. The export includes a small WordPress plugin, the Canvasly Headless Connector. It tells the front end to refresh when you publish or update a post, opens drafts in preview, points "View post" links at the new site and gives you a Rebuild now button. Astro sites are fully static and rebuild through your host's deploy hook.
8. Check before you switch. Compare staging with the live site (see the checklist below), then point your domain at the new front end.
Path B, step by step: rebuild as static HTML, Astro or Next.js
1. Rebuild the site from its address. Choose Import, Whole website, Rebuild a website, enter the address and confirm that you own the site or have permission to copy it. Pick the pages (up to 50 at a time), and choose how to rebuild them: the same design converted directly, native Canvasly units that are easier to restyle, or rebuilt by the AI using your own AI key. Images, backgrounds, SVGs, videos and web fonts are downloaded into the project, so the new site does not depend on the old server.
The import follows the site's links and sitemap, leaves out pages that robots.txt disallows, points links between the imported pages at the new pages, and keeps structured data (JSON-LD). The original site's scripts are listed, never copied: you review them and add only the ones you trust.
2. Use MCP for the repetitive part. With the MCP server turned on, your coding assistant can do the bulk work. You can ask it, in plain words:
"Rebuild example.com as a new Canvasly project. Then set up a design system from the old site's colours and fonts, and check that every page has a title and description."
The assistant works on the project you have open. Its changes appear in the editor straight away, and Ctrl+Z undoes them. Keep Canvasly open while it works.
3. Pick the output. Export as a static website (HTML, one stylesheet, one small script, optimised images, sitemap.xml, robots.txt and structured data) and upload it to any host. Or export an Astro or Next.js project if you want a framework you can extend.
4. Replace what WordPress did for you. This is the step the viral threads skip. See the next section.
What AI will not migrate for you
An honest list, because this is where migrations go wrong:
- Forms. WordPress form plugins process submissions on the server. A static site needs a form endpoint or service. Canvasly forms can post to an endpoint you set, but you have to choose and test one.
- Online shops. A shop needs a cart, payments and orders. Keep the shop plugin running on WordPress and use the headless storefront: Canvasly supports Sidcraft Commerce first and WooCommerce second. Payment itself stays on the store.
- Memberships, comments and search. These need server code. Keep them on WordPress (Path A) or replace them with a service.
- Custom post types, ACF and shortcodes. Check each one. Content from plugins that need their own JavaScript is shown as its HTML fallback, and the export report lists them.
- Redirects. If any URL changes, add permanent (301) redirects on your host. Keep the same addresses wherever you can.
- Search rankings. Titles, descriptions, headings, canonical links, structured data and the sitemap must carry over. Imported pages keep their structured data (JSON-LD), but you still need to check titles, descriptions and the rest page by page.
The migration checklist
Run it on a staging address before you switch the domain.
- Inventory. List every page and post (the old sitemap is a good source), every form, every plugin that adds a feature, and your top pages by traffic.
- Same URLs. Match the old addresses, or write redirects for every change.
- SEO fields. Titles, descriptions, canonical links, Open Graph tags and structured data, page by page for your top 20 pages.
- Content. Open ten posts and compare them with the old site: headings, lists, tables, embeds, images and alt text.
- Forms. Submit every form and confirm the message arrives.
- Speed. Test the new pages on a phone with your own tools and compare them with the old ones. Do not trust anybody's numbers, including mine.
- Accessibility. Keyboard navigation, headings order, colour contrast and image descriptions.
- Sitemap and robots. Submit the new sitemap in Google Search Console after the switch.
- Keep WordPress for a while. Do not delete the old site for a few weeks. Watch Search Console for errors.
Which path should you choose?
- A brochure site that rarely changes: Path B, static HTML or Astro.
- A blog or news site with editors: Path A. Editors stay in WordPress, visitors get Astro or Next.js.
- A shop: Path A with the headless storefront, with Sidcraft Commerce or WooCommerce on the WordPress side.
- A client site that the client must edit: WordPress with Canvasly Client Mode. The client edits marked text, photos and prices on the live page while the layout stays locked.
The honest summary
AI makes the design and bulk-conversion work much faster. It does not decide what your site must keep, and it does not test your forms or your redirects. Treat it like a quick junior colleague: give it clear instructions, review everything, and keep the old site until the new one has earned its place.
Try it on a copy first. Download Canvasly Web Studio and use the free 7-day trial.
Related reading: Headless CMS vs. monolithic CMS · How to set up headless WordPress with Next.js or Astro · Headless WordPress with Canvasly · Canvasly Client Mode