
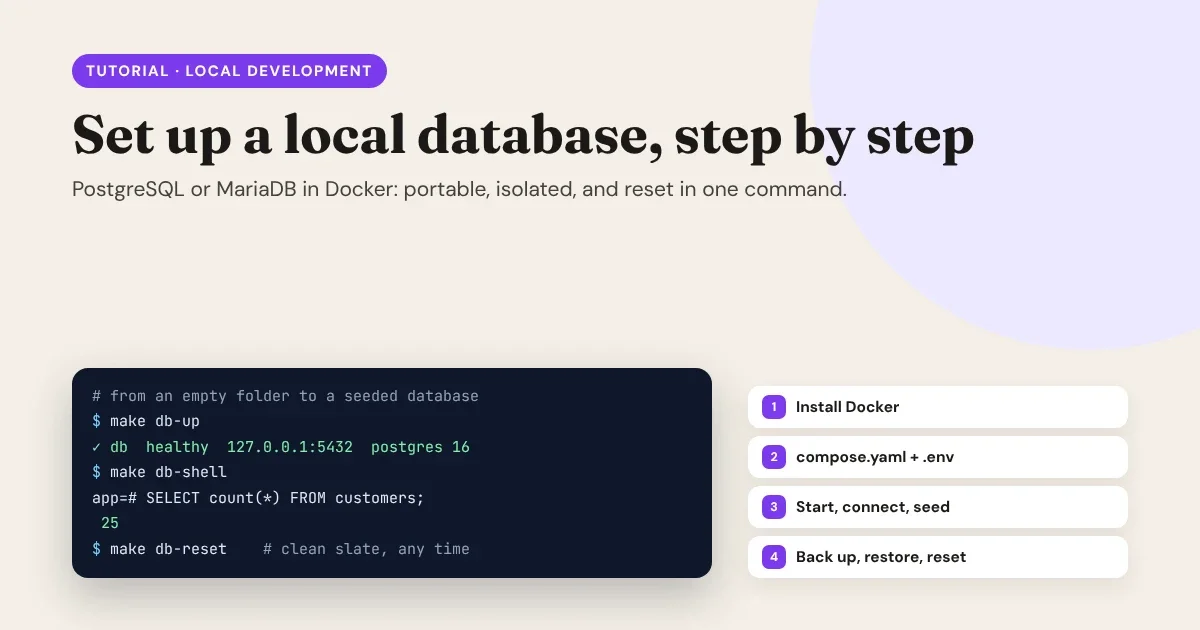
In our Local development setup guide we said every layer of your environment should be written down, so a new machine needs one command. This tutorial does exactly that for the layer that causes the most trouble: the database. By the end you'll have a PostgreSQL database that starts in seconds, is reachable only from your own computer, comes with realistic test data, and can be backed up, restored or wiped clean with a single command. A MariaDB + WordPress version follows, for headless WordPress work.
Your database should be the easiest part of your setup: started in seconds, safe from the network, and reset in one command.
- Portable: the same PostgreSQL version on every machine.
- Isolated: reachable only from your own computer.
- Disposable: wipe it and get fresh test data in one command.
What we’re building
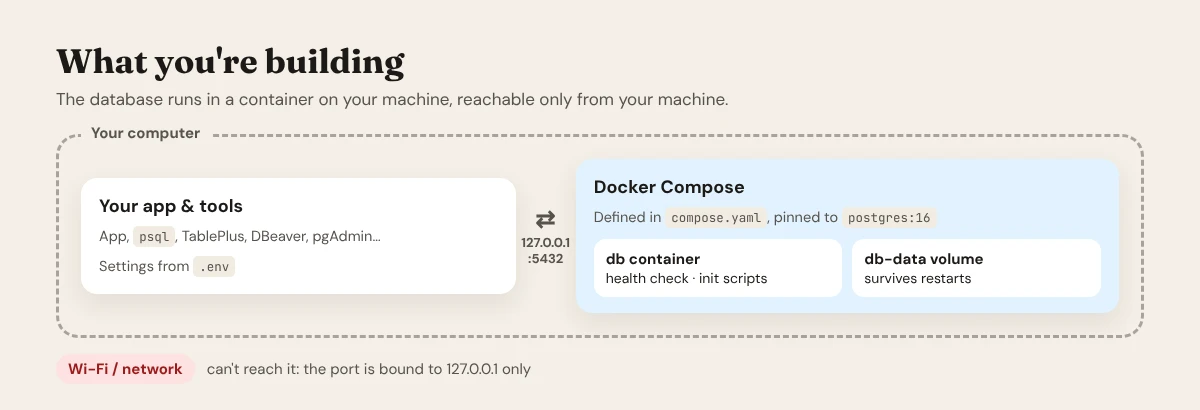
What you'll end up with:
my-project/
├── compose.yaml          # the database, defined once
├── .env.example          # settings everyone shares (committed)
├── .env                  # your copy of the settings (not committed)
├── .gitignore
├── Makefile              # db-up, db-shell, db-reset, db-dump …
├── db/
│   └── init/             # runs once, on a fresh database
│       ├── 01-extensions.sql
│       ├── 02-schema.sql
│       └── 03-seed.sql
└── backups/              # your dumps (not committed)
Step 1: Install Docker
You need Docker with Docker Compose v2 (the docker compose command, with a space).
- macOS: install Docker Desktop, or a lighter alternative such as OrbStack.
- Windows: install Docker Desktop with the WSL 2 backend, and keep your project inside the Linux filesystem (for example
~/projectsin Ubuntu on WSL), not underC:\. It's much faster. - Linux: install Docker Engine and the Compose plugin from your distribution or from Docker's repository.
Check that it works:
docker --version
docker compose version
You don't need to install PostgreSQL on your computer at all: that's the point.
Step 2: Create the project folder and settings
mkdir my-project && cd my-project
mkdir -p db/init backups
Create .env.example. It lists every setting, with safe development values. It's committed, so everyone starts from the same file:
# .env.example — copy to .env; development values only, never real secrets
POSTGRES_USER=app
POSTGRES_PASSWORD=app_dev_only
POSTGRES_DB=app
DB_PORT=5432
DATABASE_URL=postgres://app:app_dev_only@127.0.0.1:5432/app
Make your own copy, and keep it, and your backups, out of Git:
cp .env.example .env
printf '.env\nbackups/\n' >> .gitignore
Docker Compose reads .env automatically, and your app can read DATABASE_URL from it.
Step 3: Describe the database in compose.yaml
Create compose.yaml:
services:
  db:
    image: postgres:16                     # pin the major version you run in production
    environment:
      POSTGRES_USER: ${POSTGRES_USER}
      POSTGRES_PASSWORD: ${POSTGRES_PASSWORD}
      POSTGRES_DB: ${POSTGRES_DB}
    command: ["postgres", "-c", "shared_preload_libraries=pg_stat_statements"]
    ports:
      - "127.0.0.1:${DB_PORT:-5432}:5432"  # reachable from this computer only
    volumes:
      - db-data:/var/lib/postgresql/data   # your data survives restarts
      - ./db/init:/docker-entrypoint-initdb.d:ro
    healthcheck:
      test: ["CMD-SHELL", "pg_isready -U $$POSTGRES_USER -d $$POSTGRES_DB"]
      interval: 2s
      timeout: 3s
      retries: 30

volumes:
  db-data:
What each part does, and which practice from the guide it follows:
image: postgres:16: a pinned version, the same on every machine. Never uselatest.127.0.0.1:inports: the database is isolated. Your apps can reach it, the café Wi-Fi can't.db-datavolume: a named volume keeps your data between restarts, and is fast on macOS and Windows.db/init: SQL files that run once, when the database is created for the first time.healthcheck: lets tools wait until the database is really ready, not just started.pg_stat_statements: query statistics, so you can tune queries locally too (see Database performance tuning 101).
Step 4: Add the schema and seed data
Files in db/init run in alphabetical order on a fresh database.
db/init/01-extensions.sql
CREATE EXTENSION IF NOT EXISTS pg_stat_statements;db/init/02-schema.sql
CREATE TABLE customers (
  id         bigint GENERATED ALWAYS AS IDENTITY PRIMARY KEY,
  name       text        NOT NULL,
  email      text        NOT NULL UNIQUE,
  created_at timestamptz NOT NULL DEFAULT now()
);

CREATE TABLE orders (
  id          bigint GENERATED ALWAYS AS IDENTITY PRIMARY KEY,
  customer_id bigint        NOT NULL REFERENCES customers (id),
  total       numeric(10,2) NOT NULL,
  status      text          NOT NULL,
  created_at  timestamptz   NOT NULL DEFAULT now()
);

CREATE INDEX orders_status_created_idx ON orders (status, created_at);db/init/03-seed.sql: realistic, but entirely made up:
INSERT INTO customers (name, email)
SELECT 'Customer ' || g, 'customer' || g || '@example.test'
FROM generate_series(1, 25) AS g;

INSERT INTO orders (customer_id, total, status, created_at)
SELECT (random() * 24)::int + 1,
       round((random() * 200 + 10)::numeric, 2),
       (ARRAY['paid', 'pending', 'refunded'])[1 + floor(random() * 3)::int],
       now() - random() * interval '90 days'
FROM generate_series(1, 200);
Using an ORM or a migration tool? (Prisma, Django, Rails, Laravel, Flyway…) Then let it own the schema: keep only
01-extensions.sqlindb/init, and run your migrations and seeders after the database starts. The rest of this tutorial works the same.
Step 5: Start the database
docker compose up -d --wait
docker compose ps
--wait returns only when the health check passes, so the database is ready to use. docker compose ps should show db as healthy.
Step 6: Connect to it
From the terminal (no local PostgreSQL install needed):
docker compose exec db sh -c 'psql -U "$POSTGRES_USER" -d "$POSTGRES_DB"'SELECT count(*) FROM customers; -- 25
SELECT status, count(*) FROM orders GROUP BY status;
\qFrom a desktop tool (TablePlus, DBeaver, pgAdmin, or your editor's database panel): connect to host 127.0.0.1, port 5432, with the user, password and database name from .env.
From your app: use DATABASE_URL from .env.
Step 7: One command for everything
Typing long Docker commands gets old fast. Put them in a Makefile, so every task is one short word:
# Makefile — make sure the indented lines start with a TAB, not spaces
.PHONY: db-up db-down db-logs db-shell db-reset db-dump db-restore db-stats

db-up:      ## start the database and wait until it's ready
    cp -n .env.example .env 2>/dev/null || true
    docker compose up -d --wait

db-down:    ## stop it (data is kept)
    docker compose down

db-logs:    ## follow the database log
    docker compose logs -f db

db-shell:   ## open psql
    docker compose exec db sh -c 'psql -U "$$POSTGRES_USER" -d "$$POSTGRES_DB"'

db-reset:   ## wipe everything and start fresh (re-runs db/init)
    docker compose down -v
    docker compose up -d --wait

db-dump:    ## save a backup to backups/
    docker compose exec -T db sh -c 'pg_dump -U "$$POSTGRES_USER" -d "$$POSTGRES_DB" --format=custom' > backups/app-$$(date +%Y%m%d-%H%M).dump

db-restore: ## restore one: make db-restore FILE=backups/app-....dump
    docker compose exec -T db sh -c 'pg_restore -U "$$POSTGRES_USER" -d "$$POSTGRES_DB" --clean --if-exists --no-owner' < $(FILE)

db-stats:   ## the 10 queries with the most total time
    docker compose exec db sh -c 'psql -U "$$POSTGRES_USER" -d "$$POSTGRES_DB" -c "SELECT calls, round(total_exec_time::numeric,1) AS total_ms, left(query, 80) AS query FROM pg_stat_statements ORDER BY total_exec_time DESC LIMIT 10;"'
Now a new team member's instructions are just:
git clone … && cd my-project
make db-up
make db-shellIf a task needs a long command, it belongs in the Makefile. Then the README is just: clone,
make db-up, start coding.One command for everything
Step 8: Back up, restore and reset
make db-dumpsaves a compressed backup with a timestamp inbackups/. Do it before risky migrations or experiments.make db-restore FILE=backups/app-20261114-0930.dumpputs it back.make db-resetdeletes the database and volume, then recreates it, running your init scripts and seed data again. It's the fastest cure for "my local data is in a weird state".
Working with a copy of production data
Sometimes you need real volumes to reproduce a bug. Use an anonymised copy, never raw customer data:
- Take the dump on a secure server or a staging copy, not on your laptop.
- Restore it into a temporary database there, and anonymise it:
UPDATE customers
SET name  = 'Customer ' || id,
    email = 'customer' || id || '@example.test';
-- …and the same for addresses, phone numbers, payment details and free-text notes- Dump the anonymised copy, bring that file home, and
make db-restore FILE=….
Variant: MariaDB + WordPress (for headless WordPress)
Working on a WordPress site, or on a headless front end for one? Here's the same approach with MariaDB, WordPress and Mailpit to catch emails.
.env.example
MARIADB_ROOT_PASSWORD=root_dev_only
MARIADB_PASSWORD=wp_dev_only
compose.yaml
services:
  mariadb:
    image: mariadb:11
    environment:
      MARIADB_ROOT_PASSWORD: ${MARIADB_ROOT_PASSWORD}
      MARIADB_DATABASE: wordpress
      MARIADB_USER: wordpress
      MARIADB_PASSWORD: ${MARIADB_PASSWORD}
    volumes:
      - wp-db:/var/lib/mysql
    ports:
      - "127.0.0.1:3306:3306"
    healthcheck:
      test: ["CMD", "healthcheck.sh", "--connect", "--innodb_initialized"]
      interval: 5s
      timeout: 5s
      retries: 20

  wordpress:
    image: wordpress:6                       # match the version you run in production
    depends_on:
      mariadb:
        condition: service_healthy
    environment:
      WORDPRESS_DB_HOST: mariadb
      WORDPRESS_DB_USER: wordpress
      WORDPRESS_DB_PASSWORD: ${MARIADB_PASSWORD}
      WORDPRESS_DB_NAME: wordpress
    ports:
      - "127.0.0.1:8080:80"
    volumes:
      - wp-files:/var/www/html

  mail:
    image: axllent/mailpit
    ports:
      - "127.0.0.1:8025:8025"                 # inbox in your browser
      - "127.0.0.1:1025:1025"                 # SMTP

volumes:
  wp-db:
  wp-files:
cp .env.example .env
docker compose up -d --waitOpen http://localhost:8080 and finish the WordPress installer. Useful commands for this variant:
# Back up the WordPress database
docker compose exec -T mariadb sh -c 'mariadb-dump -u root -p"$MARIADB_ROOT_PASSWORD" wordpress' > backups/wp.sql

# Restore it
docker compose exec -T mariadb sh -c 'mariadb -u root -p"$MARIADB_ROOT_PASSWORD" wordpress' < backups/wp.sql
WordPress sends email with PHP's mail function by default. To see every message in Mailpit (http://localhost:8025), install an SMTP plugin and point it at host mail, port 1025.
Design the headless front end with Canvasly
With WordPress running locally, you can build its fast front end without touching production:
- In WordPress, go to Settings → Permalinks and choose Post name.
- Open the Canvasly Web Studio desktop app and choose Connect WordPress Site…, then enter
http://localhost:8080. The desktop app accepts local addresses for exactly this kind of work. - Design the post, page, blog and shop templates, bind them with Bind to WordPress, and export a Next.js or Astro front end.
- Run the export next to your local WordPress with
npm installandnpm run dev.
The full walk-through is in How to set up headless WordPress with Next.js or Astro.
Never put real customer data on a laptop. Seed data for daily work, and an anonymised copy when you truly need production volumes.
Data safety
Troubleshooting
"Port is already allocated" or "address already in use". Another database already uses the port, often a PostgreSQL or MySQL installed with Homebrew or an installer. Stop it, or set DB_PORT=5433 in .env (and in DATABASE_URL), then make db-up.
My init scripts didn't run. They only run when the database is created for the first time. Run make db-reset to start from an empty volume.
I changed the password in .env and now I can't log in. The password is also set only on first creation. Change it back, or run make db-reset.
"Connection refused" right after starting. The database wasn't ready yet. Always start with docker compose up -d --wait, which waits for the health check.
It's slow on macOS or Windows. Keep the data in a named volume (as above), not a folder shared with your computer. On Windows, keep the project inside WSL 2.
I want to see what the database is doing. make db-logs follows the log, and make db-stats shows the queries that take the most time.
Checklist: did we follow the guide?
| Practice from the setup guide | Where it is in this tutorial |
|---|---|
| Pinned versions | postgres:16, mariadb:11, wordpress:6 |
| Services in containers | compose.yaml, with nothing installed on your computer |
| Isolated | Ports bound to 127.0.0.1, one project per folder |
| Safe configuration | .env.example committed, .env and backups ignored |
| Realistic data | Seed scripts, and anonymised production copies only |
| One command for everything | make db-up, db-shell, db-reset, db-dump, db-restore |
| Reset any time | make db-reset |
| Fast | Named volumes, WSL 2 on Windows, health checks instead of guessing |
Conclusion
A local database shouldn't be a weekend project or a source of "works on my machine" bugs. With one compose.yaml, one .env.example and a few Makefile tasks, it becomes portable (the same everywhere), fast (seconds to start, seconds to reset) and isolated (your data, your machine, nobody else's). Commit the files, and the next person to join your project is one make db-up away from working.
Building the website side too? Try Canvasly Web Studio free for 7 days at canvasly.pro.
Related reading: Local development setup guide · Database performance tuning 101 · Headless CMS vs. monolithic CMS